Topic
Basic WordPress settings for website
It is important to get the WordPress basic configuration of your website setup correctly for it to function as intended. This guide could help you to get started. It covers steps such as logging into the WordPress admin, managing key configuration fields for the website, and customizing elements like the header panel, footer panel and menu items.
Usage
This guide is useful for users who are not familiar with WordPress. It provides the basic setup and configuration changes that you can make for website running on WordPress
Key points to note
- It's crucial that the Site Title and Tagline accurately represent the purpose of your website.
- Do not squeeze in too many menu items to your header panel
- Only put the most important menu item that you want visitor to view at the primary menu
Steps
1. Access the WordPress admin login page by entering your website address followed by “/wp-admin”

2. Key in the login credential in the dialogue box

1. Mouse over on "Users" side panel item and select "All Users" menu item

2. Click on the "Edit" link under the Admin user

3. On the screen displayed, scroll down to the Account Management section and click on the "Set New Password" button

4. After changing your password, scroll to the bottom of the page and click on "Update Profile" button to complete the password change
1. Mouse over on "Settings" side panel item and select "General" menu item

2. The following are important settings that need to be set correctly in order for your website to appear correctly in search result

Note: website header is the standard header template used in website pages to hold the business name, business logo and the main menu of the website. It would be repeated in the pages published on the website.
The header and footer setup features may vary depending on the WordPress theme used
1. Mouse over on "Appearance" side panel item and select "Customize" menu item

2. Click on the "Header" side menu item

3. The position of header menu can be adjusted by shifting the relative positioning in the setup panel below

4. By clicking on the + icon, additional widgets or functions can be added to the header panel

5. Secondary menu can be added to be header panel

1. Mouse over on "Appearance" side panel item and select "Customize" menu item
2. Click on the "Footer" side menu item
")
3. Click on the Gear icon on the footer setting would allow you to change the column format for the row selected

4. Click on the + sign on the footer setting would allow you to select the type of preset footer menu to be added

5. Click on the Gear icon on the selected footer format, it would make the + block to appear on the left hand panel
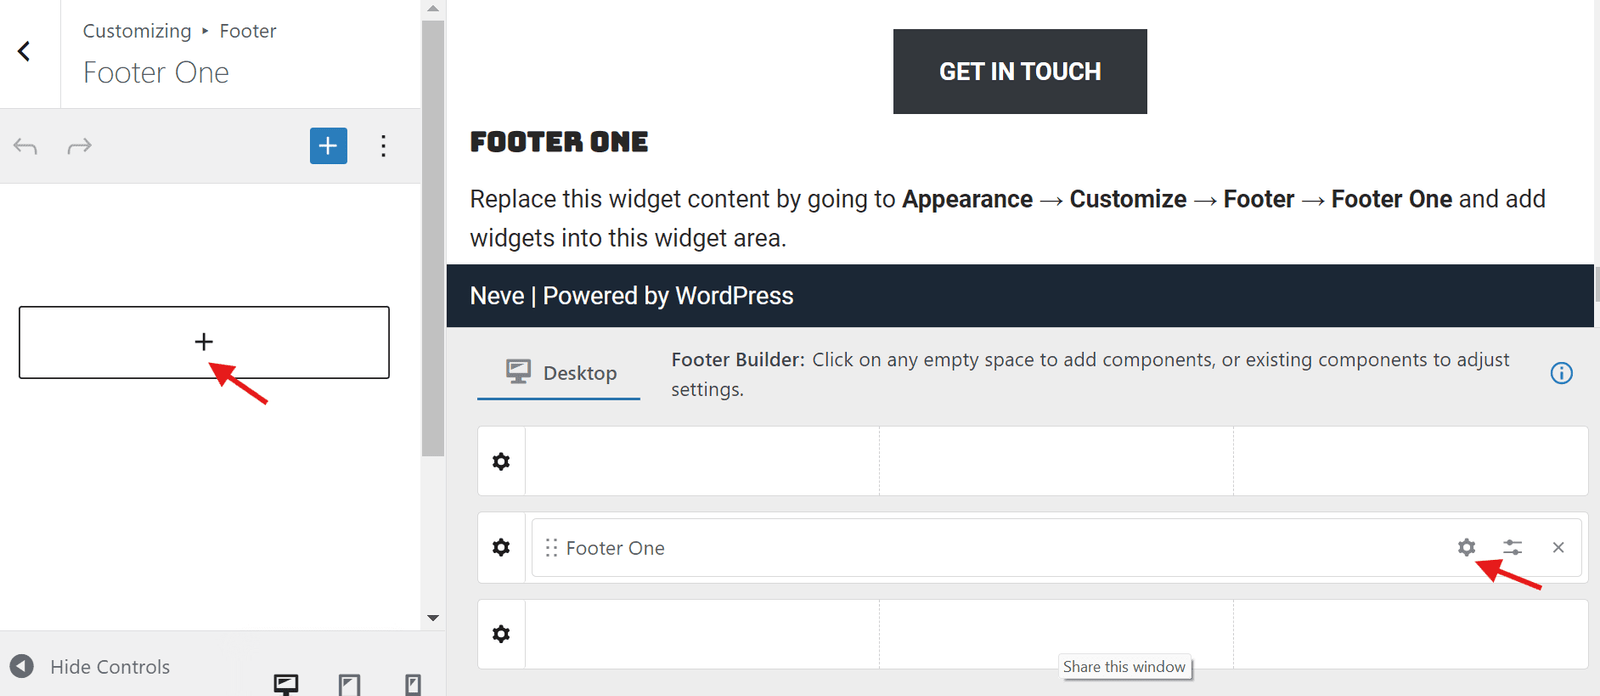
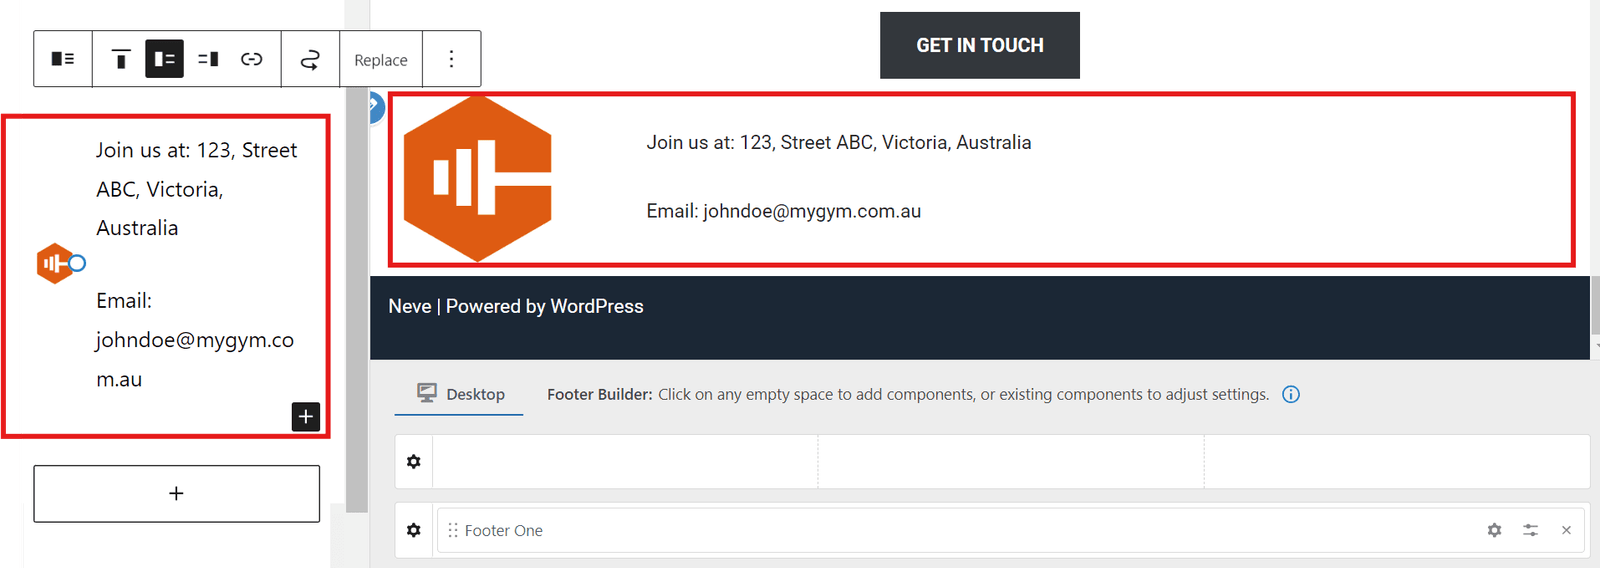
6. Click on the + sign at the side panel and it would allow you to add information or links to the footer panel
1. Mouse over on "Appearance" side panel item and select "Customize" menu item
2. Click on the "Menus" side menu item

3. Click on the tile just below the "Menus" heading

4. The current menu items would appear at the side panel. Click on the "+ Add items" will allow you to add or remove the menu items

5. Click on the "x" sign to remove a menu item and click on "+" sign to add new menu item

6. Submenu item can be added to a menu item by dragging the menu item into the parent menu item

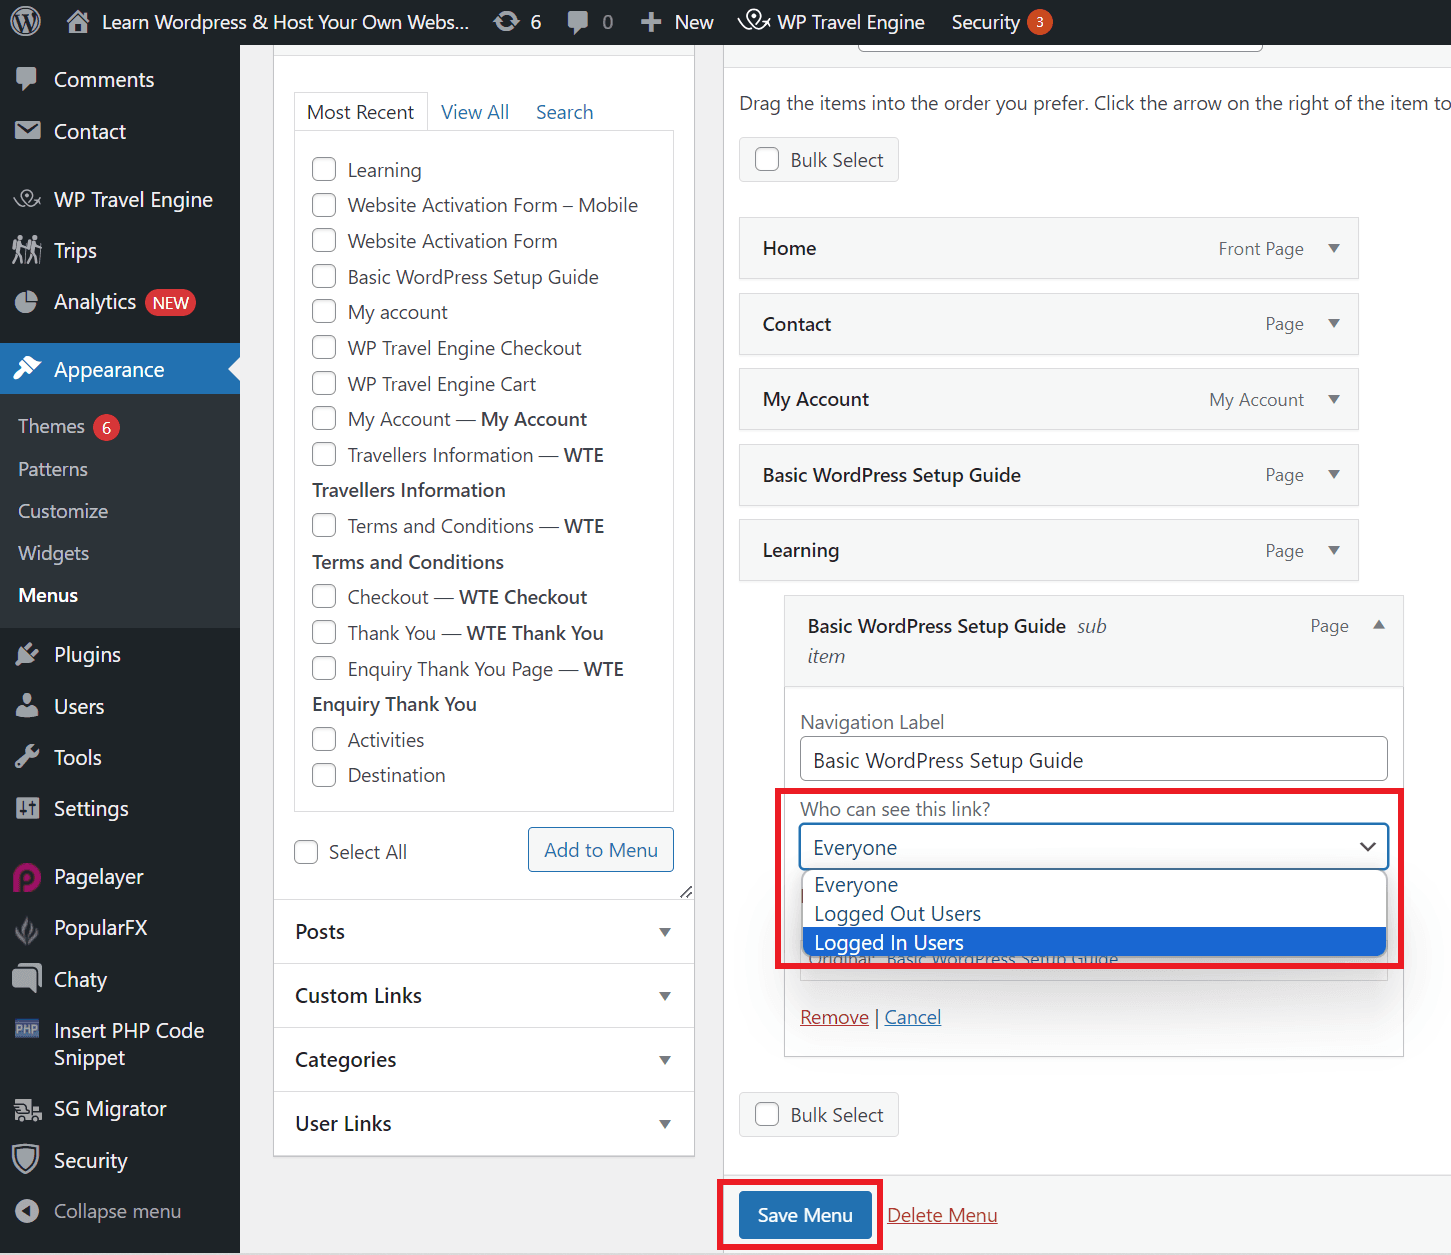
7. With the plugin below, it enhances the menu functionality. It will allow access control on the viewing of the menu item

8. After installed and activated the plugin in Step 7, go to the "Menus" menu item under the "Appearance" side panel item
Note: Settings in Step 4 - 6 can be performed via this function too

8. The access to the selected menu item can be controlled by selecting the options in the dropdown list highlighted below and activated when "Save Menu" button is clicked.