Topic
Google Search Console setup guide
It is important to make your website searchable by your potential web visitors. As Google Search is the "de-facto" search engine in the World Wide Web currently, knowing how Google Search crawl and index your website is key in determining your website's success. This user guide would share with you some key basic features of Google Search Console and how to check if your website is crawled by Google Search.
Usage
Google Search Console is a free tool provided by Google for you to link your website with Google Search, and for you to monitor the natural search trend of your website. It is able to tell you if your website has been crawled and indexed by Google (Note: Google deployed robot crawlers to constantly crawl in the web to find new web pages). It also works as an analysis tool for you to understand who had visited your website (IPs, Countries), when did that happened, and by what search word they had found your website
Key points to note
- Your website may not be automatically indexed by Google, it is safer to ascertain that via Google Search Console
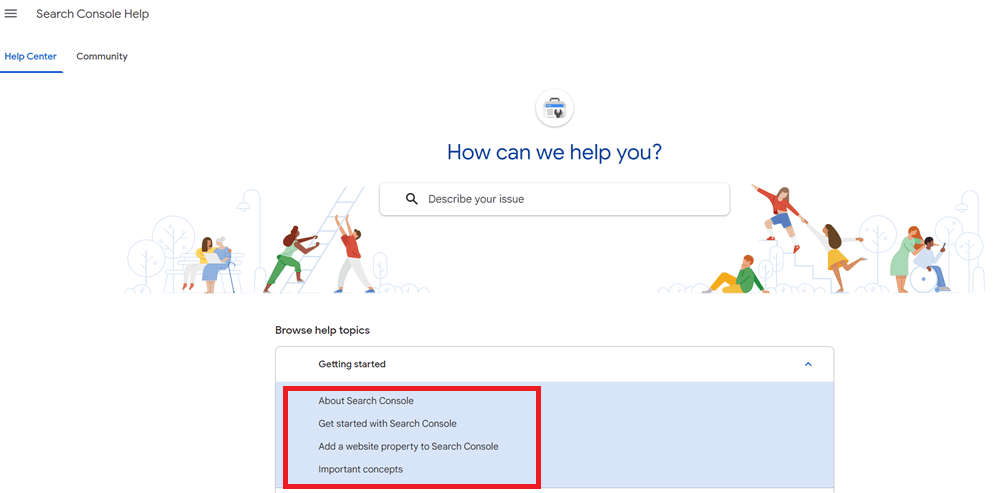
- It is essential to understand how Google Search works (at least at the high level), find it out through Search Console Help
- It is important to have your Sitemap linked to Google Search as it tells Google where to look for content in your website
Steps
1. Use the Google Chrome browser and login into your Google account. In the Google search box, type in "Search Console", and click on the search result at the top that is displayed as "Google Search Console Tools". Then, click on the "Start Now" button to start using Google Search Console.

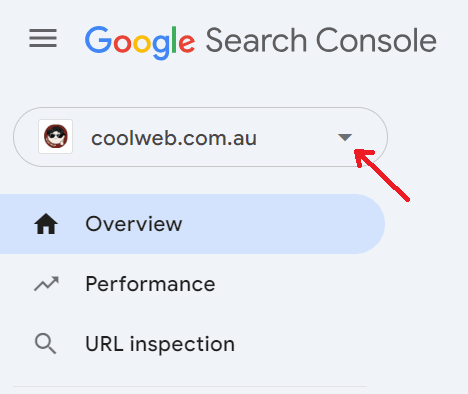
2. In the Search Console dashboard displayed, at the left top corner, click on the triangle button beside the website name.
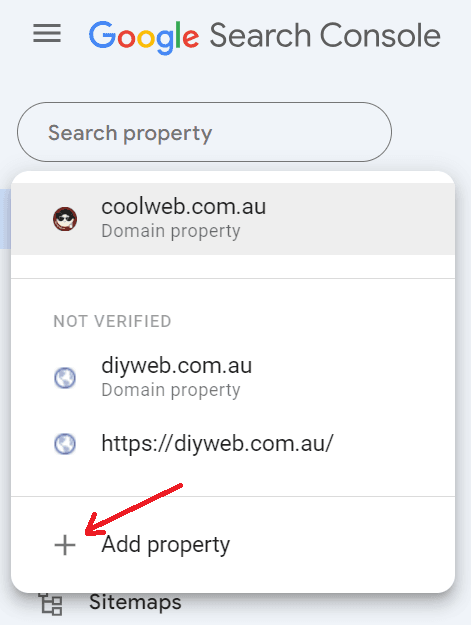
3. In dropdown list displayed, click on the "+" sign beside the Add Property.
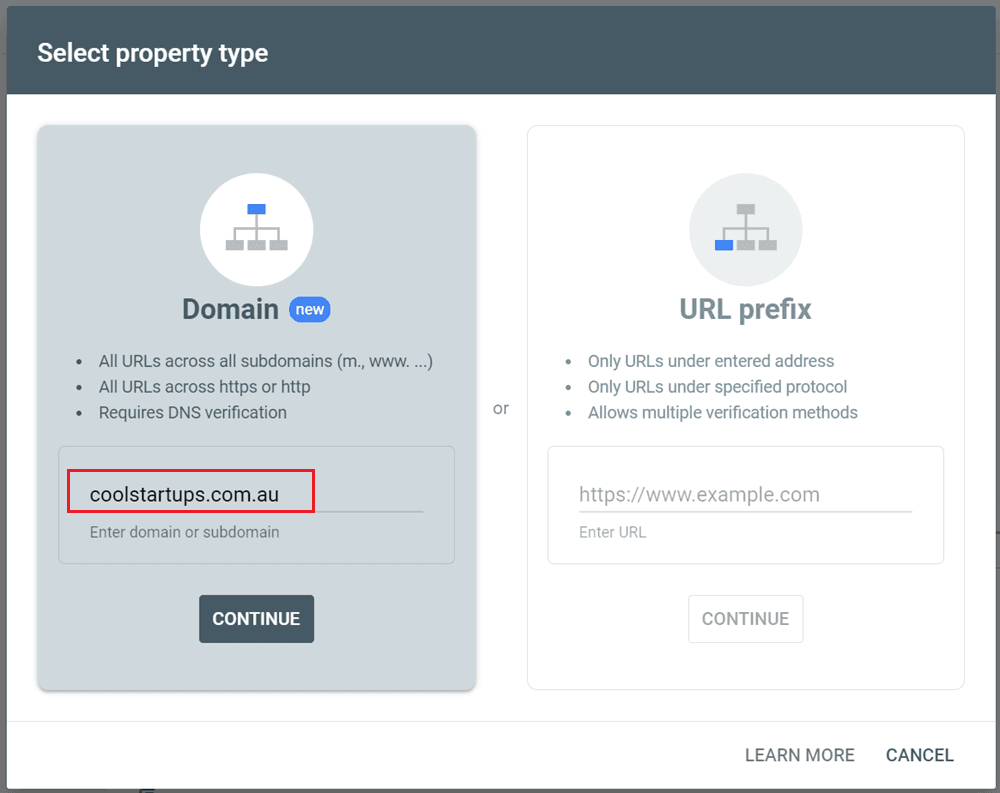
4. Type in your website address into the field allocated under the Domain box.
5. From the instruction displayed where it is mentioned "Copt the TXT record below into the DNS...", click on the COPY button.
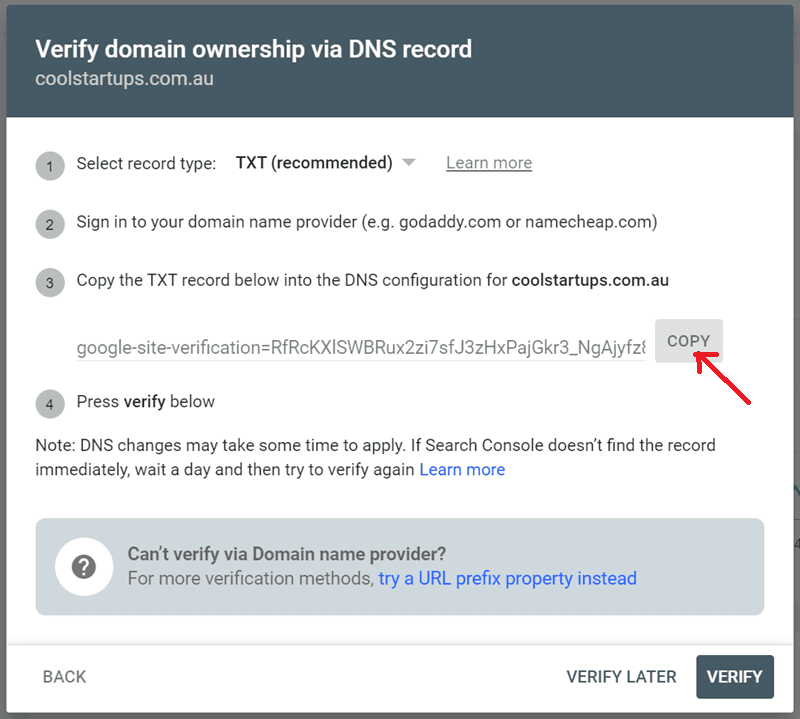
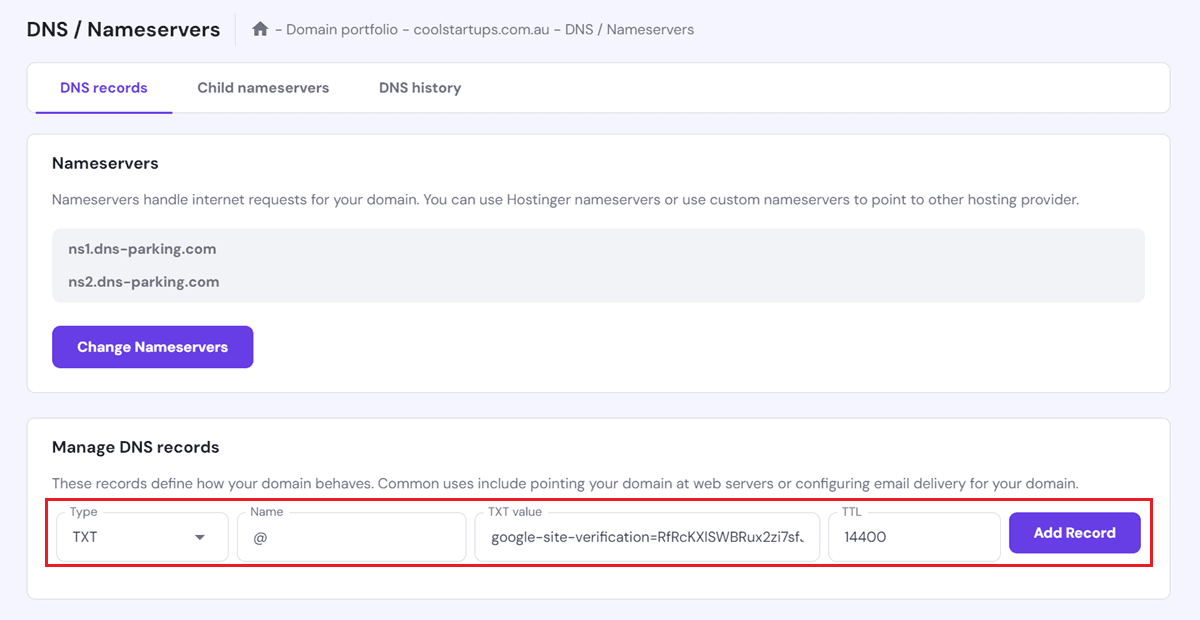
6. In the DNS config functionality provided by you web service provider, add a DNS record to your domain by copying the text string provided by Google into the "TXT value" of the new TXT record (This part is a bit technical, get your web service provider to help setting it up if it is too hard for you).
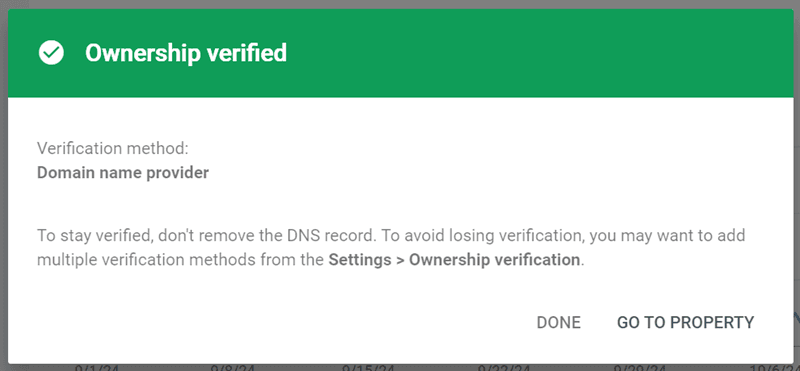
7. After completed step 6, go back to the Search Console screen as shown in Step 5. click on the "Verify" button and the "Ownership verified" message will be displayed on the screen.
1. In the Search panel on the top of the Search Console dashboard, type in your website URL a.k.a. web address.

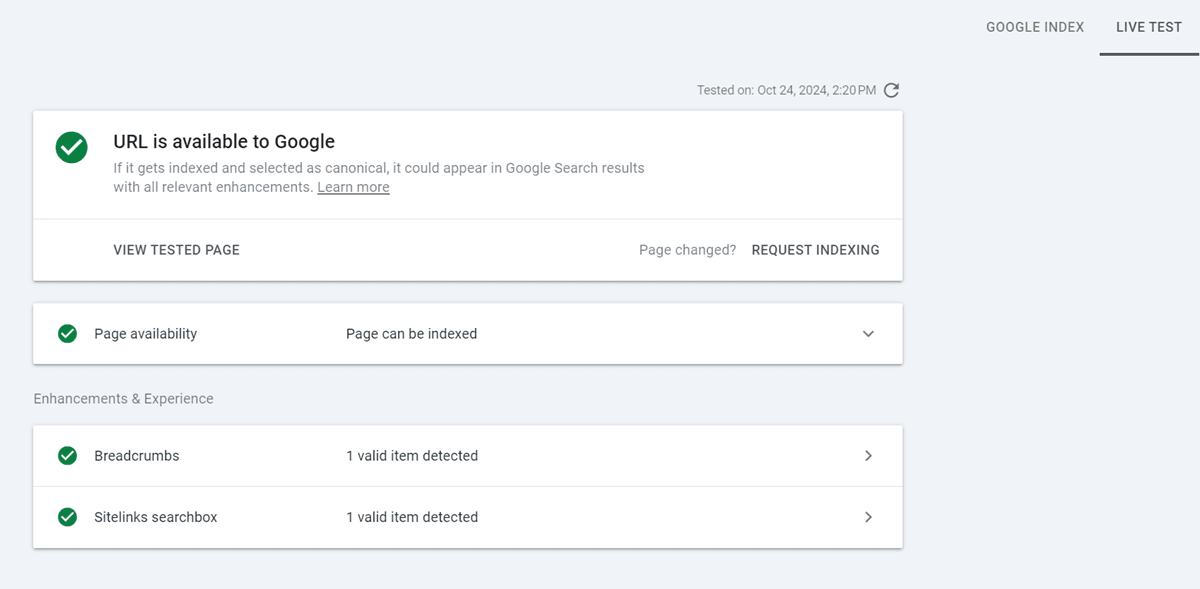
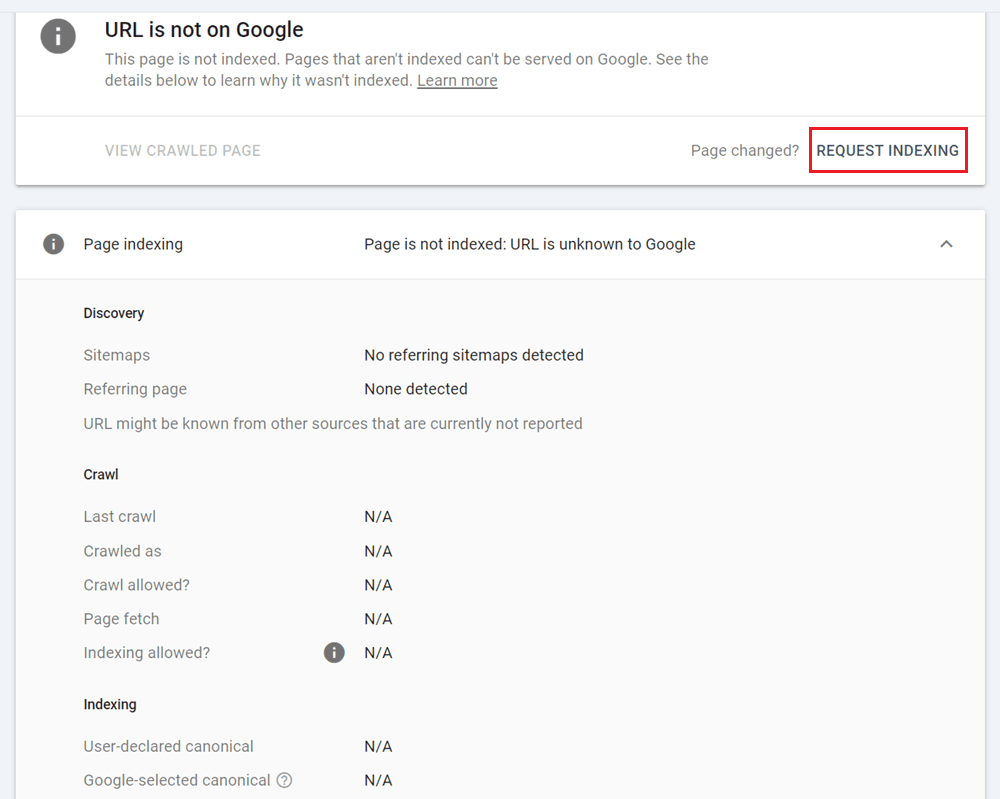
2. Google Search Console will perform the URL Inspection. In the case that your website is not indexed by Google, it will be displayed in the result "URL is not on Google". You can run a test by clicking on TEST LIVE URL button on the top right-hand corner of the screen.

3. The result will indicate if your website is indexable by Google. If it is shown as indexable, then the reason your website is not indexed yet, could be because Google has not found your page yet. You can either wait for Google crawler to find your website or request Google to crawl your website.
1. To request Google to index your web pages, click on the REQUEST INDEXING button found below the result of the URL inspection.
2. Google would place your request to be indexed in their priority crawl queue.
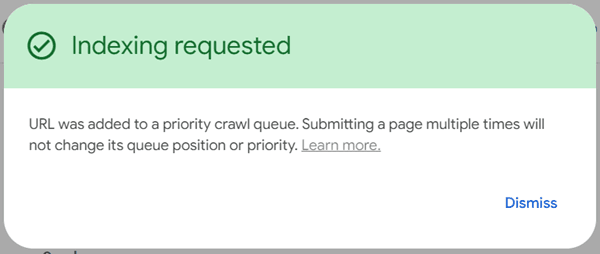
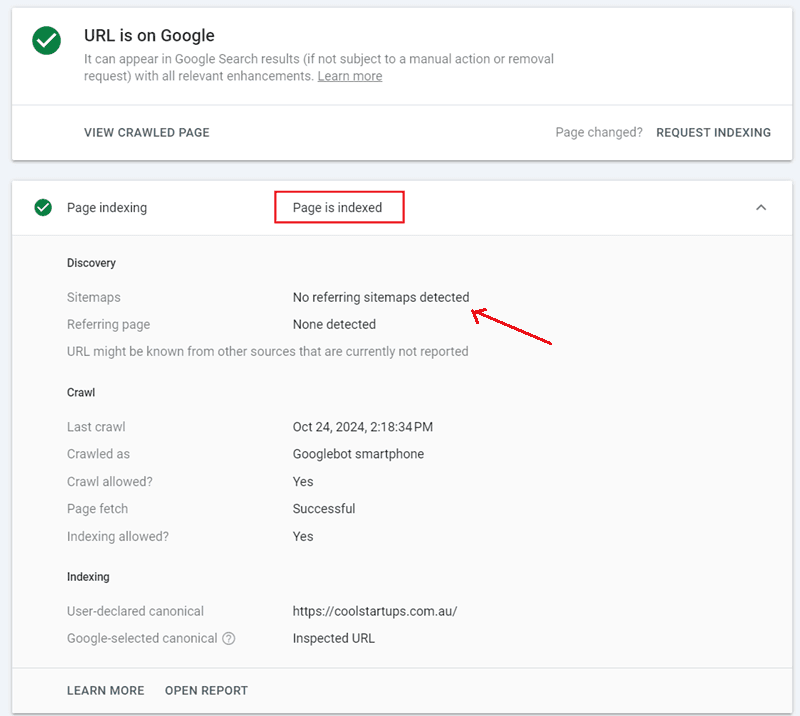
3. Try to refresh your browser after you submit your crawl request, and search for your website URL again in Search Console, if the result shows "Page is indexed", it means your website is now searchable by visitors via Google. Your request to be indexed might not always be acted upon immediately by Google, you might need to wait for a few days before your request is performed.
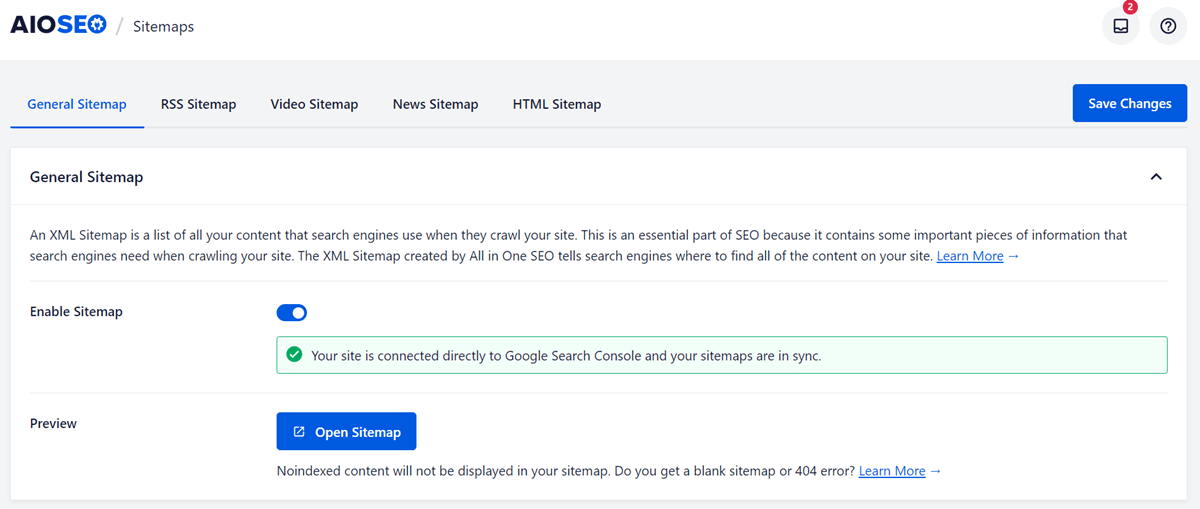
1. Sitemap is important as it tells Search Engine where to look for pages or posts in your website. For the purpose of demonstrating how it works, AIOSEO WordPress plugin is used here.
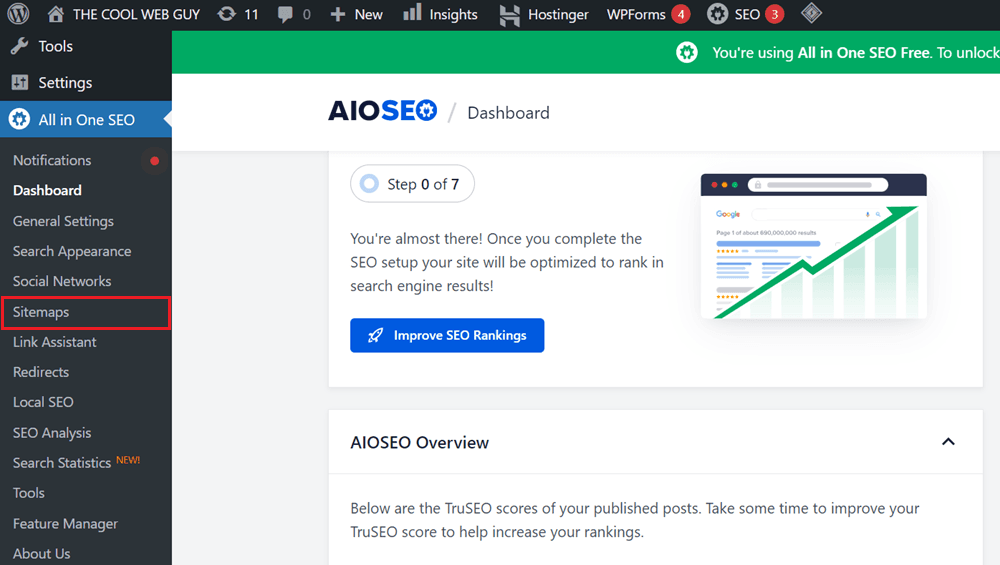
2. After the Sitemaps menu item at the side panel is selected, the sitemap config screen is displayed. Clicking on the "Connect to Google Search Console" will start the setup to link your sitemap with Google.
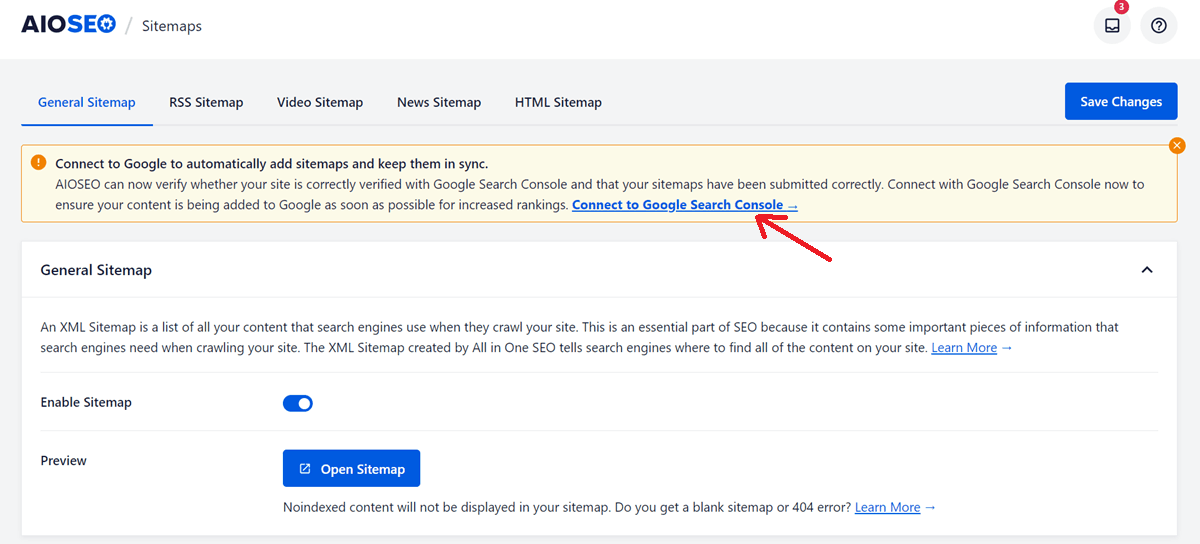
3. Before proceeding to link the sitemap with Google, click on the "Open Sitemap" button as shown on the screen in Step 2; it displays the sitemaps that AIOSEO has mapped for your website
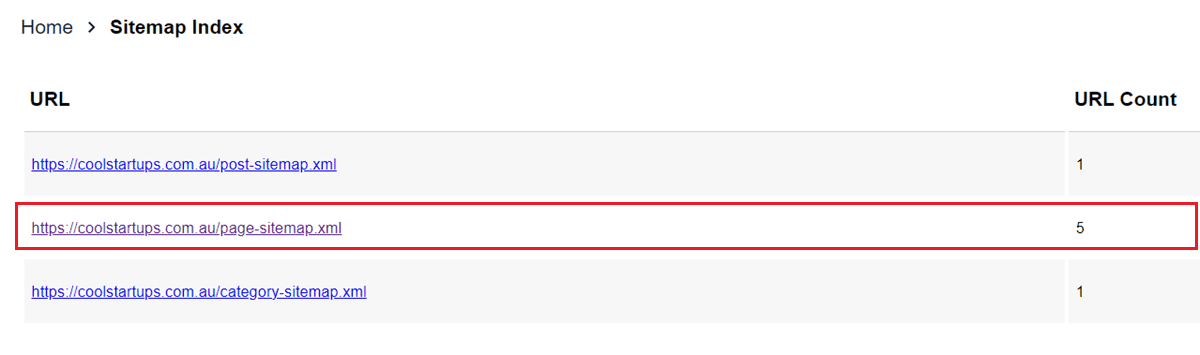
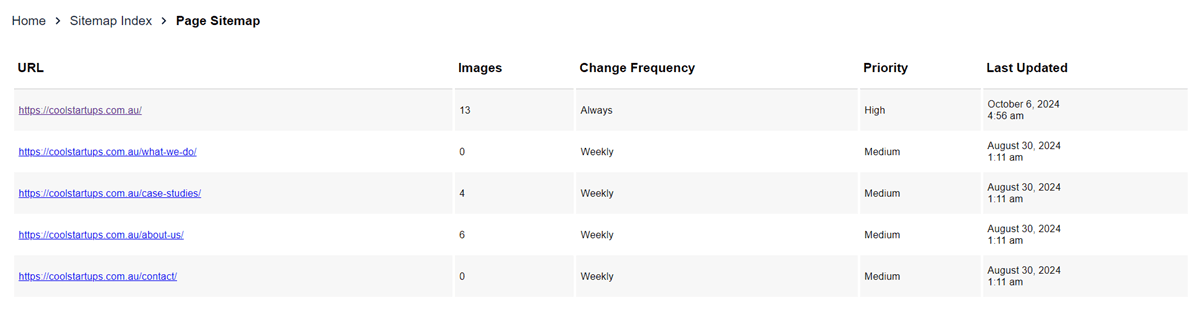
4. Clicking on the page-sitemap as shown in Step 3, will shows you the web pages that has been mapped for your website.
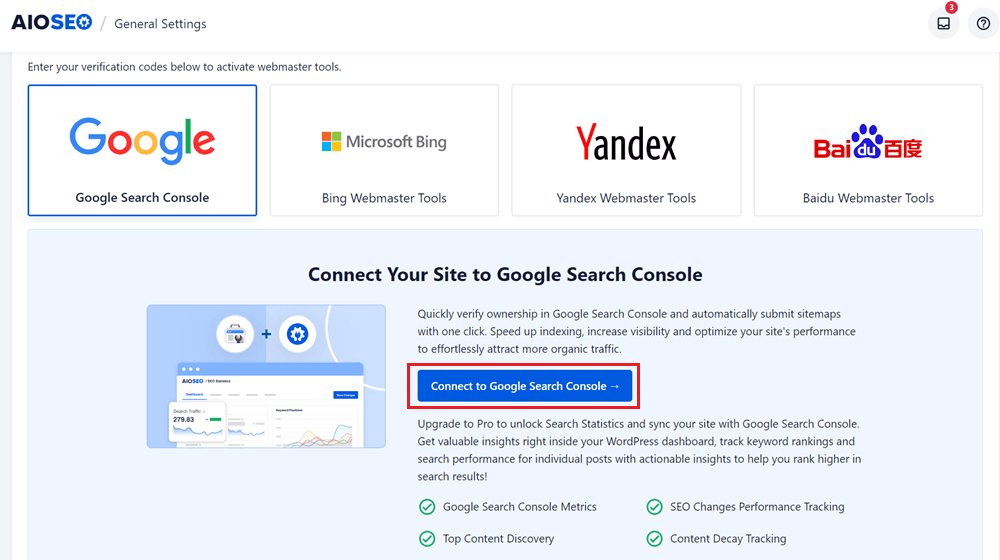
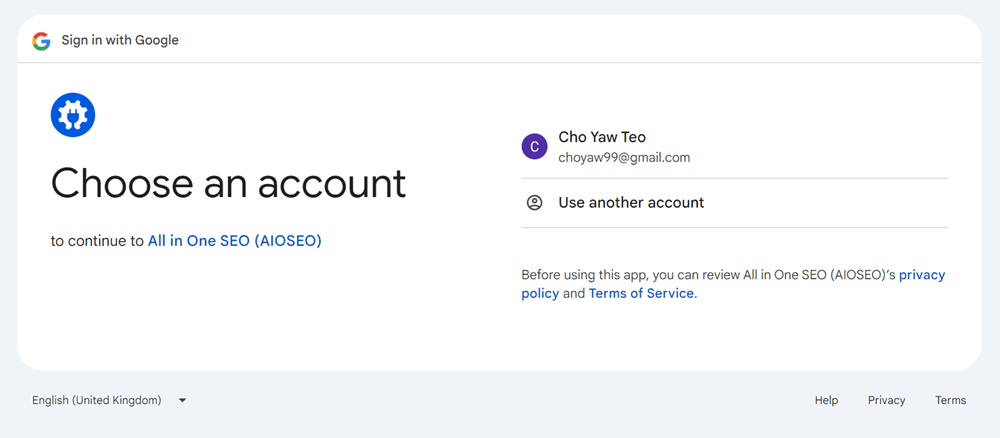
5. Now we shall continue with the linking with Google Search Console mentioned in Step 2. Click on the "Connect to Google Search Console" button as shown below to proceed with the setup.
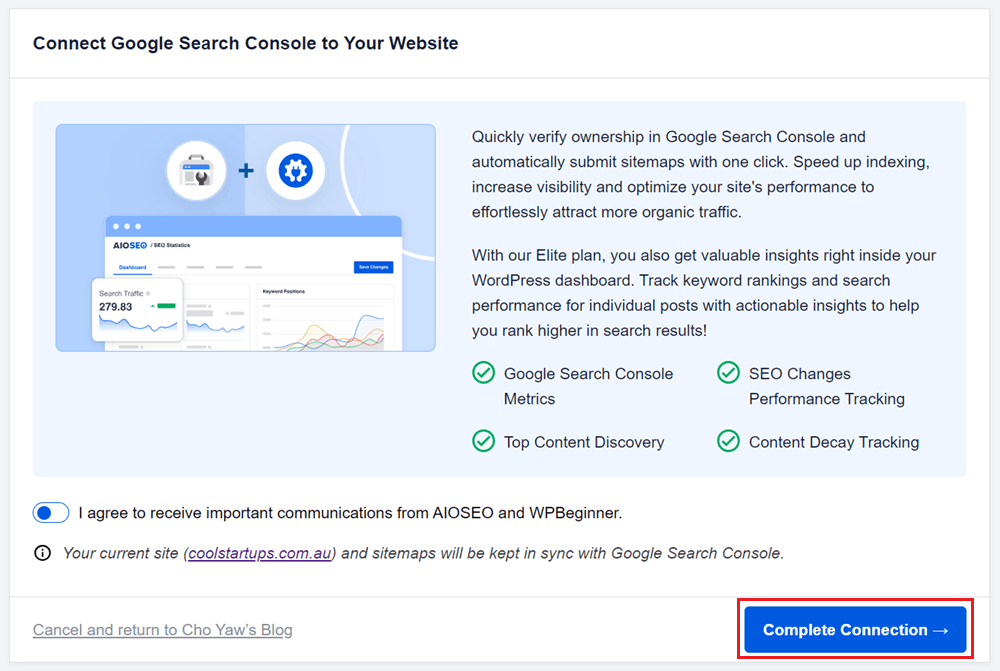
6. Follow through the next few screens as instructed by the setup.

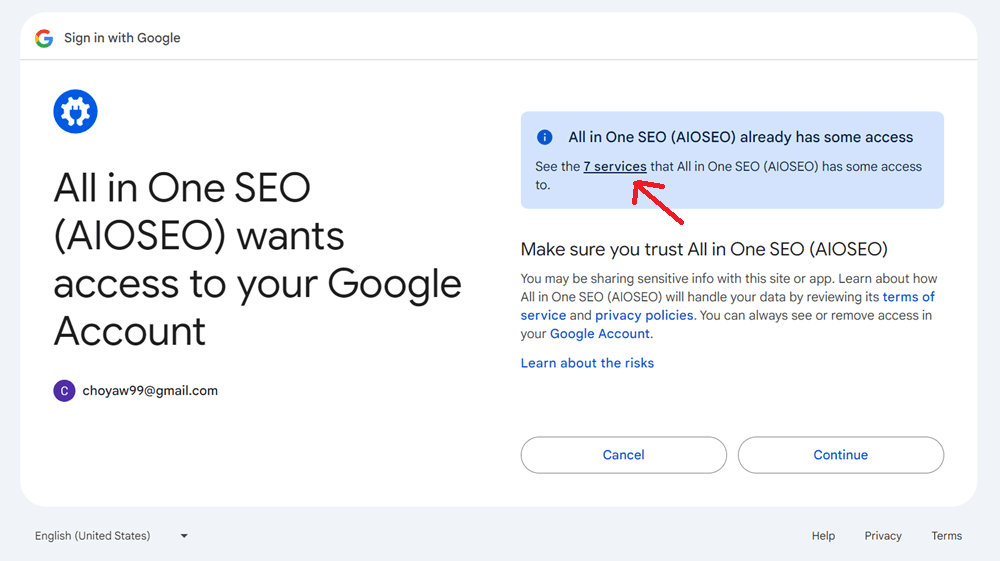
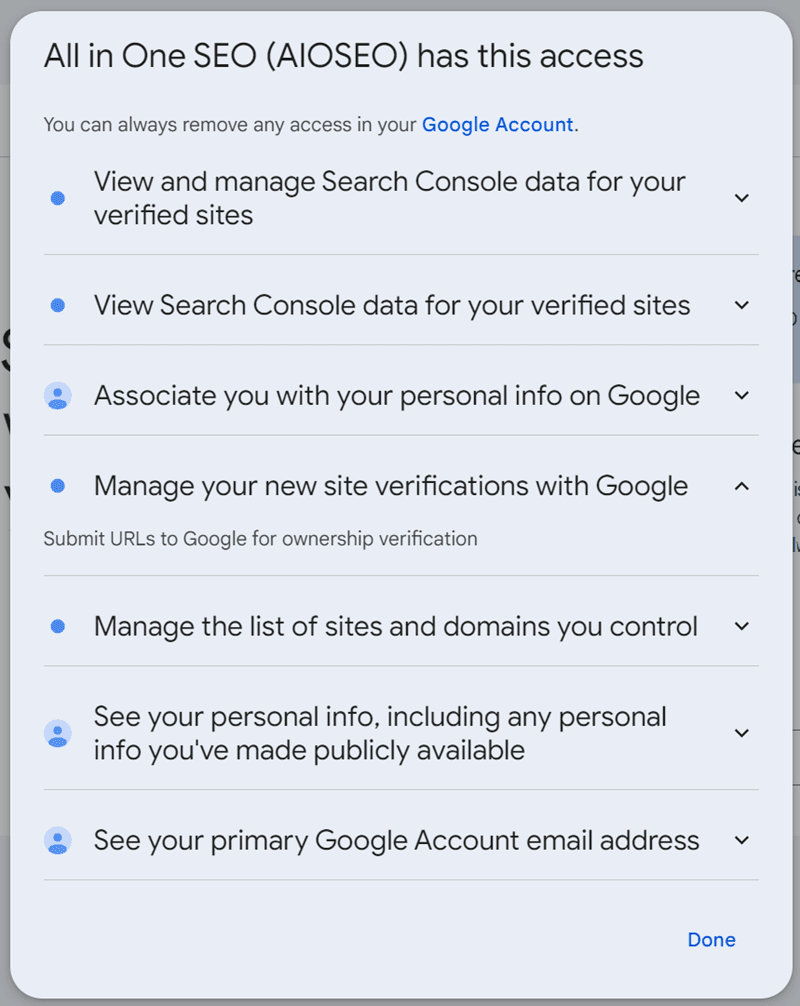
7. It is important to ascertain that you are comfortable to grant the following access to the AIOSEO.
8. After follow through all the steps of the setup, you should see a message indicating that your sitemap is in-sync with Google Search Console.
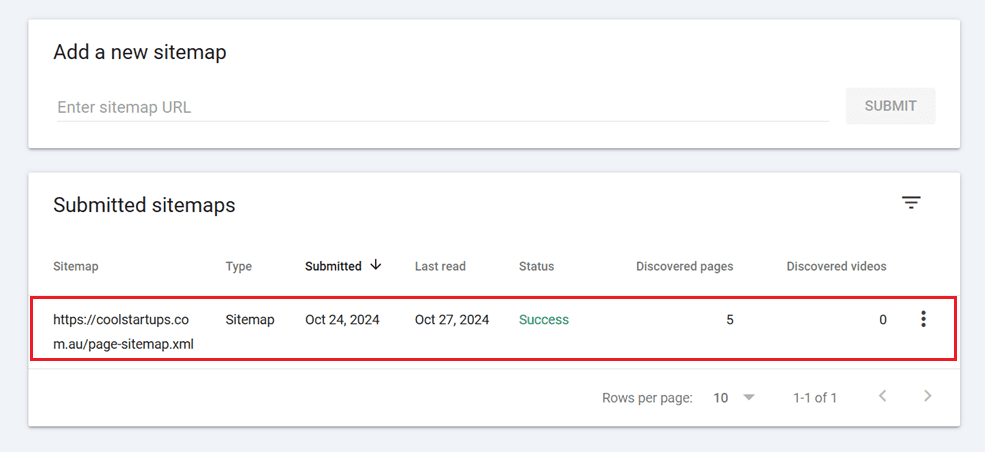
1. You can also link your Sitemap manually in Search Console. Go to the Sitemap screen in Search Console, paste in the Sitemap XML file of your website into the "Add a new sitemap" box
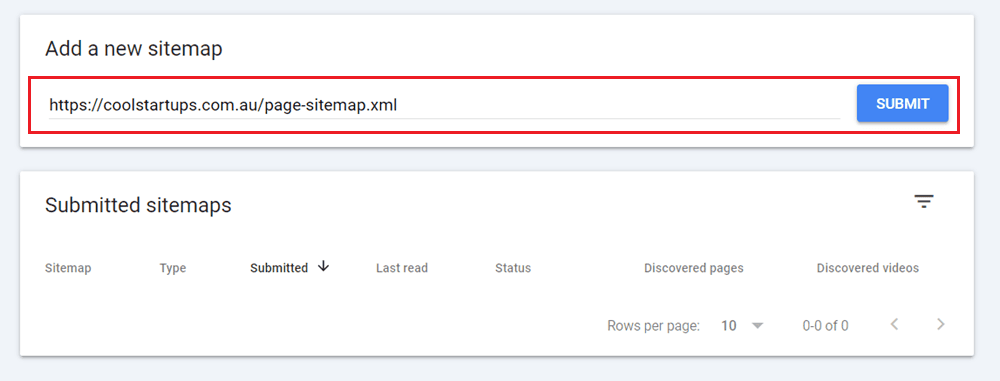
2. In the "Submitted sitemaps" panel, you shall be able to view the status of the uploaded Sitemap
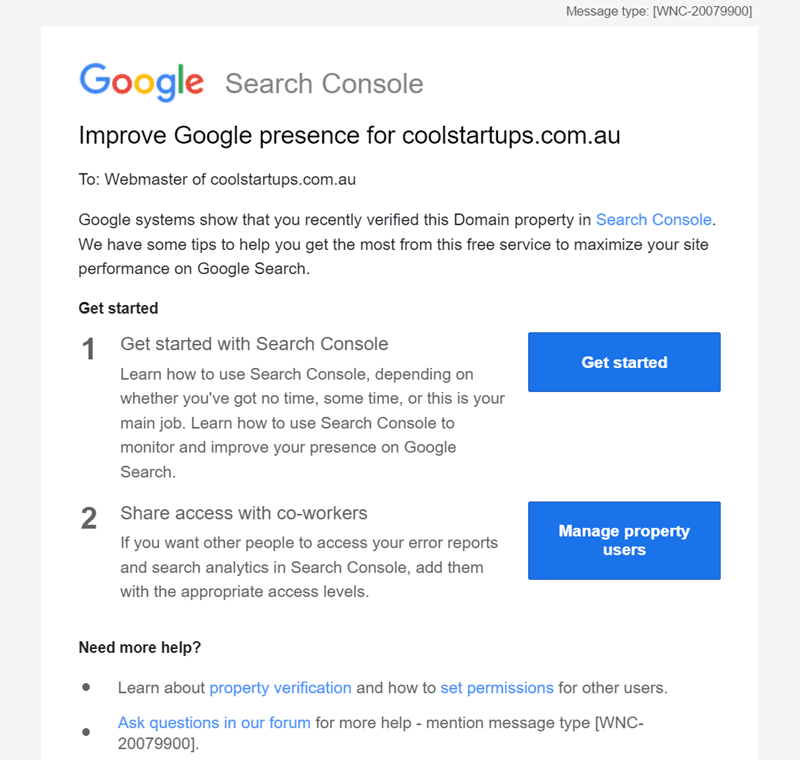
1. After you have registered your web domain with Google, you will receive an email from them sharing with you links to self help guides to get you started with Search Console.
2. Check out the artefacts in Search Console Help to learn more about features of Google Search Console