Topic
Google Ads setup guide
The quickest way to make your services or product known to your potential audience would be via Google Ads. Google Ads may appear to be easy to use at the first glance, with easy-to-follow instructions fed to you step-by-step when you create an Ad Campaign. However, setting up your Ad Campaign in this manner without knowing the detail settings of Google Ads may drain your advertising fund quickly without achieving your advertising goals. In this user guide, we will share with you how to setup an Ad Campaign in Expert Mode letting you know the implications of each setting.
Usage
Google Ads is the advertising platform offered by Google for you to bid for Keywords with certain price so that when web visitors search for the similar Keywords in Google Search, your Ad may appear in the Search result listing. Your Ad would appear in the result listing only when your Bid Price is relatively higher compared to most of the contenders. The Bid Price will determine the listing position too. The higher your Bid Price, the higher your Ad will be listed in the Search Result.
Key points to note
- Using Google Ads in Basic mode may appear to be easy, with easy-to-follow instructions fed to you step-by-step when you create an Ad Campaign. But it is not the best method if you have tight advertising budget.
- Plan your keywords before you start the Ad Campaign. Look for keywords with low competition and low bid price.
- Set your conversion goals carefully and realistically in order to measure the Ad Campaign outcome.
Steps
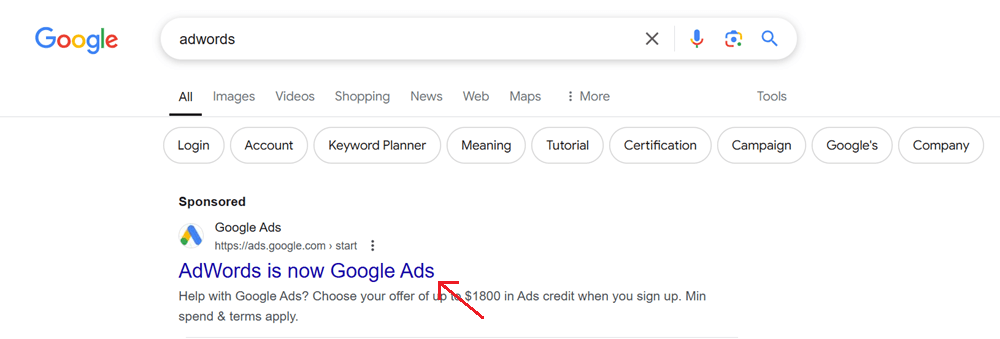
1. You can find the Google Ads by simply type in Google Ads or Adwords in the Google search.
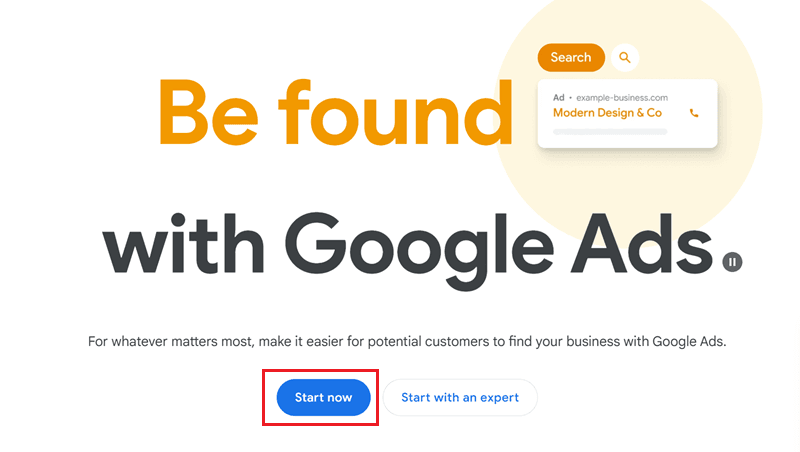
2. In the screen displayed, click on the "Start now" to start a new Ad Campaign.
Note: You need to have a Google account to proceed to the next step
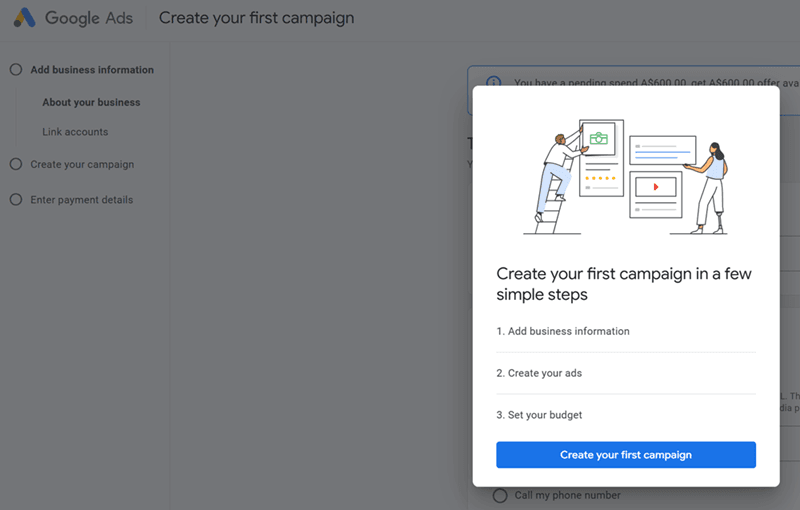
1. Create an Ad Campaign in Smart mode is the quick and concise way to setup your Ad in Google. But you do need to bear in mind that the ad campaign might not be focus enough, is like casting a net into a wider area, which would mean more fund may be spend, and that might not necessarily provide the returns that you expected.
The first screen here shows you the main stages you are expected to complete to get you Ad Campaign stated.
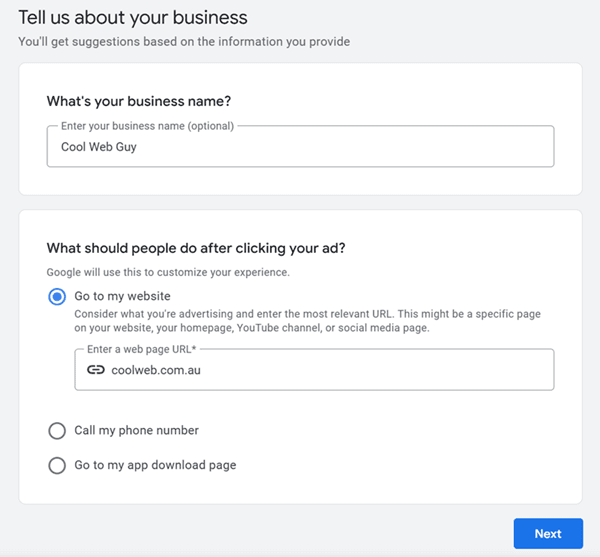
2. In the next screen, key in your business name and what actions you expect the ad would trigger e.g. click on your website, give you a call etc.
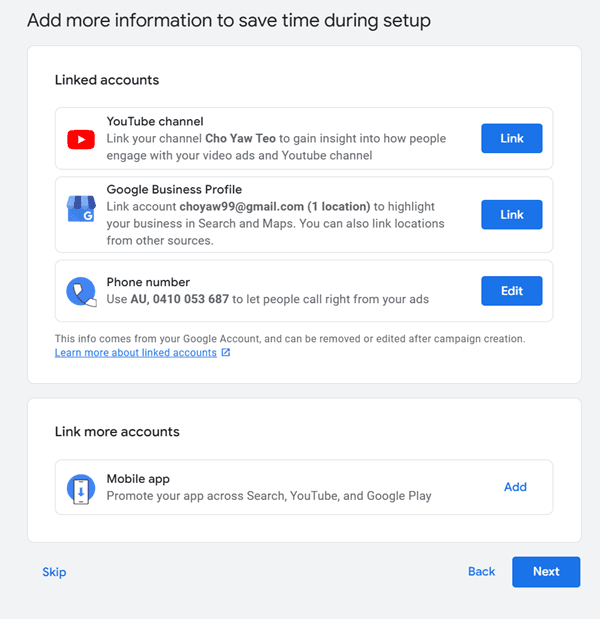
3. Next, Google would try to solicit as much information of you or your business in order for them to auto-populate as much information into the Ad in the next few steps
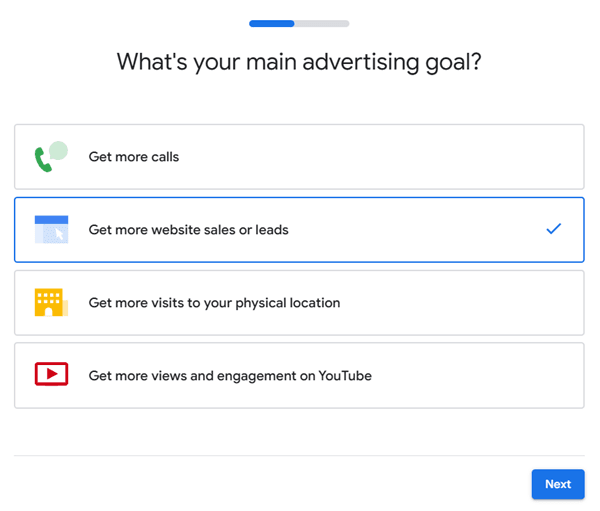
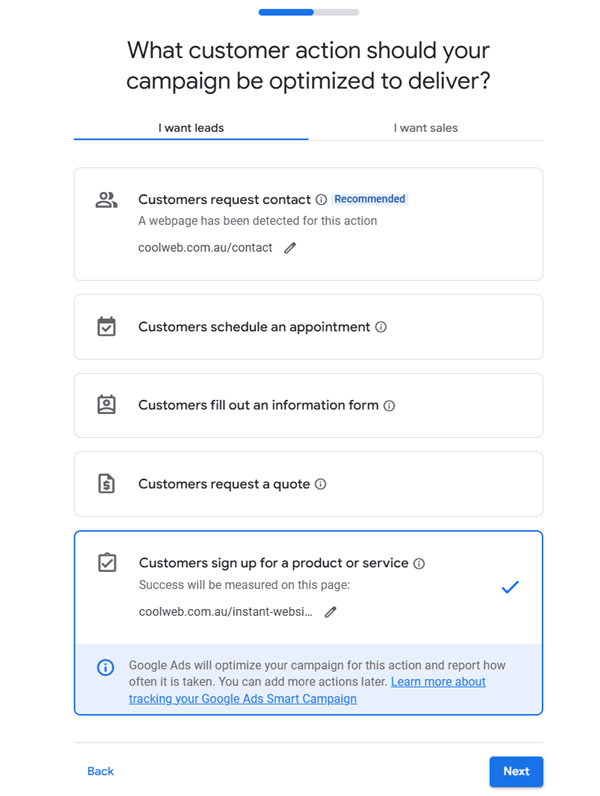
4. In the next few steps, you will be asked on your main advertising goal and what actions you expect your customers so that the campaign can be optimised to deliver your advertising objectives.
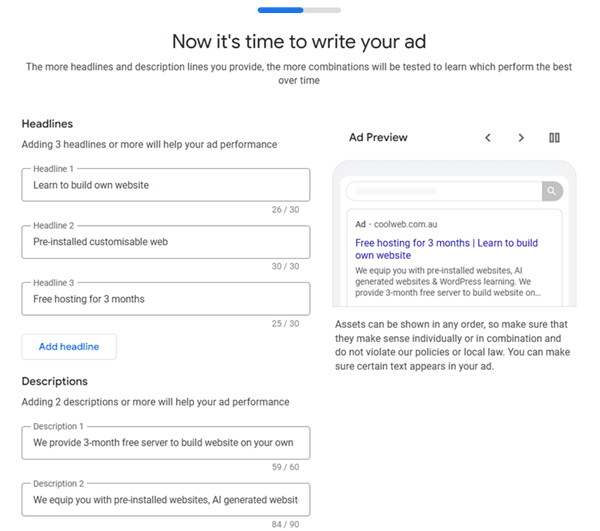
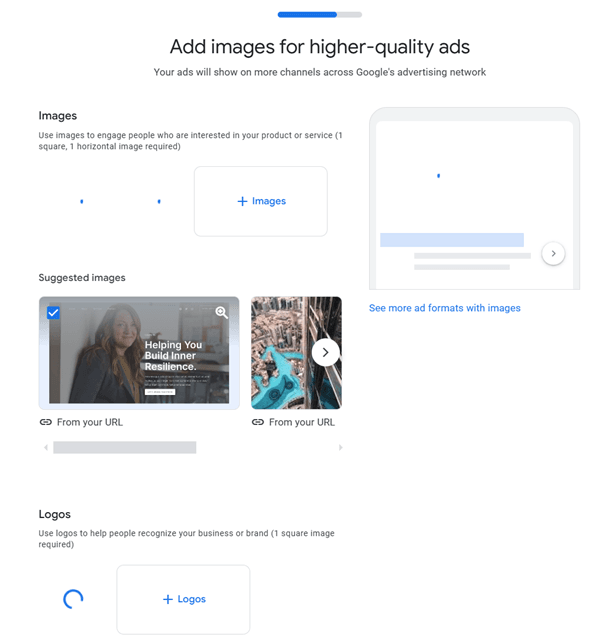
5. After going through the previous steps. Google would auto-populate the Ad headlines and descriptions for you. However, it is important that you fine tune these wordings or images so that it truly describe what you want your ad to look like.
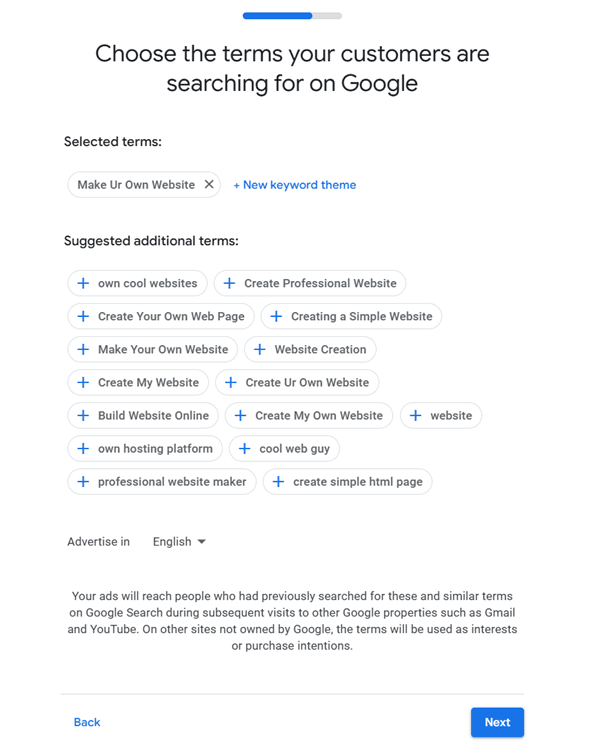
6. The next step is to determine the Keywords, this is one of the most important step as it determines when your ad would appear in Search. Google would suggest some related Keywords, you may add them into the Selected terms.
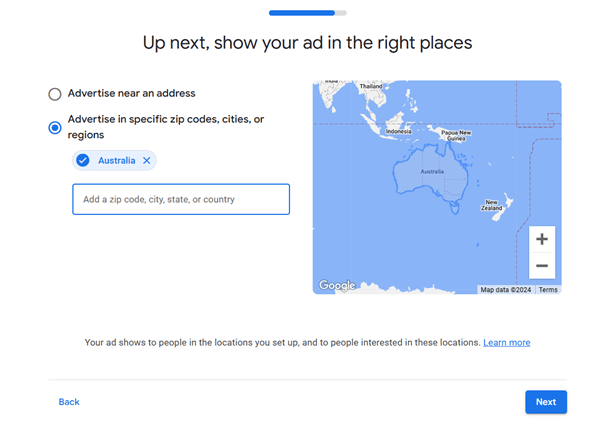
7. After the Keywords are selected, you will be asked to assign the area/region/country where you want the Ad to appear. The selection is really depending on your services or products and business models.
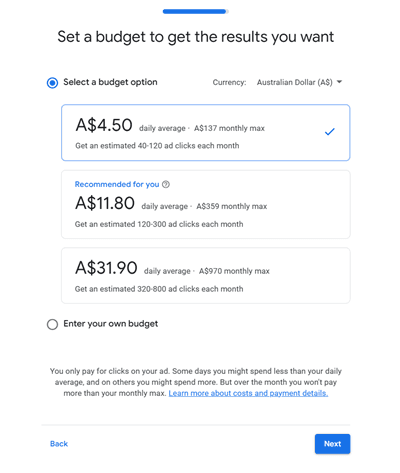
8. Next, you will be asked to specified the daily budget of your Ad. Google would recommend few amount options in order to achieve a specific number of clicks on your Ad. You may also enter your own budget in this screen.
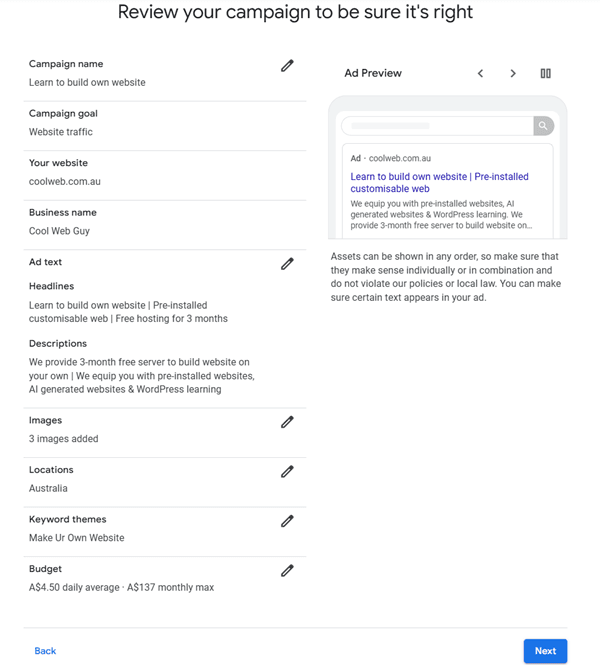
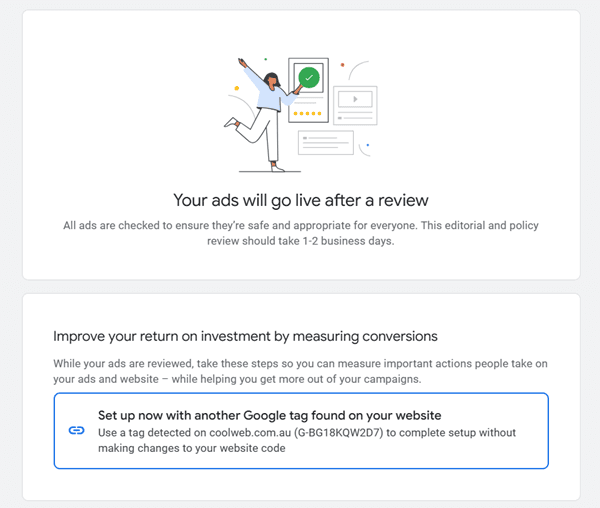
9. After you completed all of the above, you will be asked to review your Ad details. Upon confirming and clicking on "Next", you will see the message mentioning that your Ad Campaign is received and will be reviewed by Google.

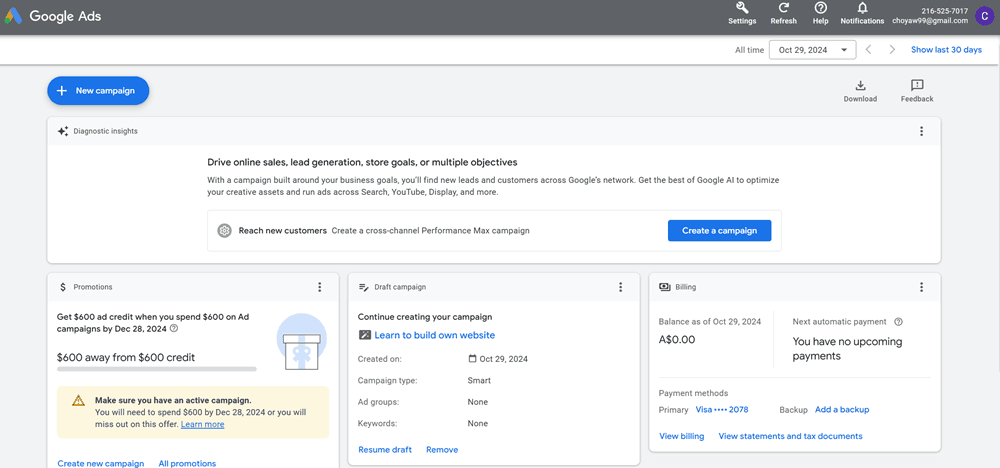
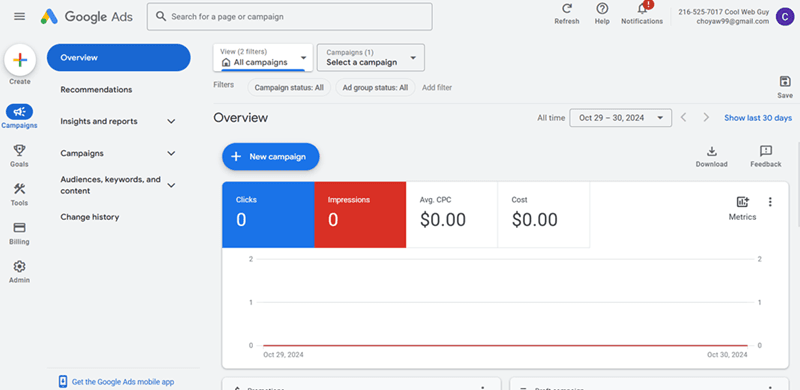
10. Upon approval of the Ad Campaign, you can continue to monitor the progress of your Ad through the Google Ads dashboard.
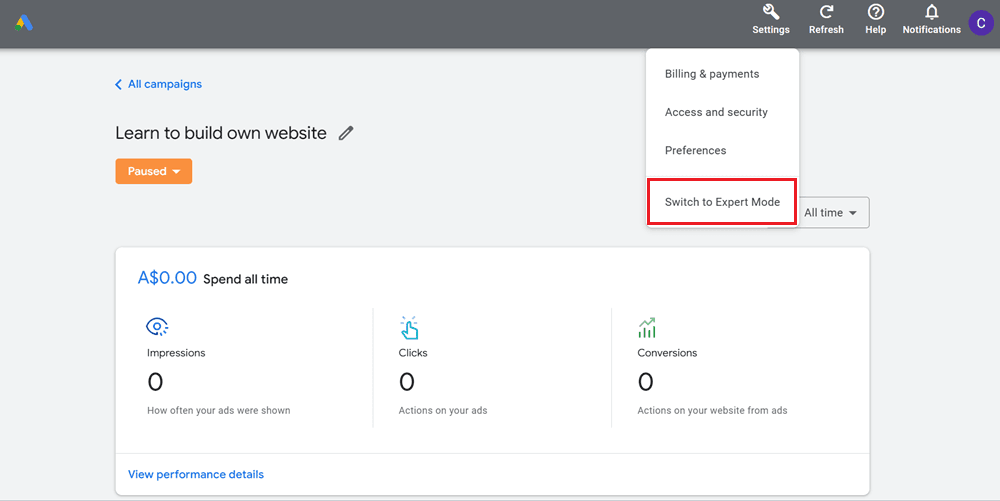
1. You can switch to Expert mode of Google Ad by clicking on the "Settings" icon on the top panel and select the "Switch to Expert Mode" option.
Note: Expert mode would allow you to configure your Ad Campaign in more targeted way, if you know campaign objective and targeted audience well. It would potentially save you a fair bits of fund needed to reach your targeted audience, and the number of conversion planned. Do note however, once you switch to Expert mode, you can't switch back to Smart mode anymore.
2. Upon clicking on the Expert mode, the comprehensive Google Ads dashboard will be displayed.
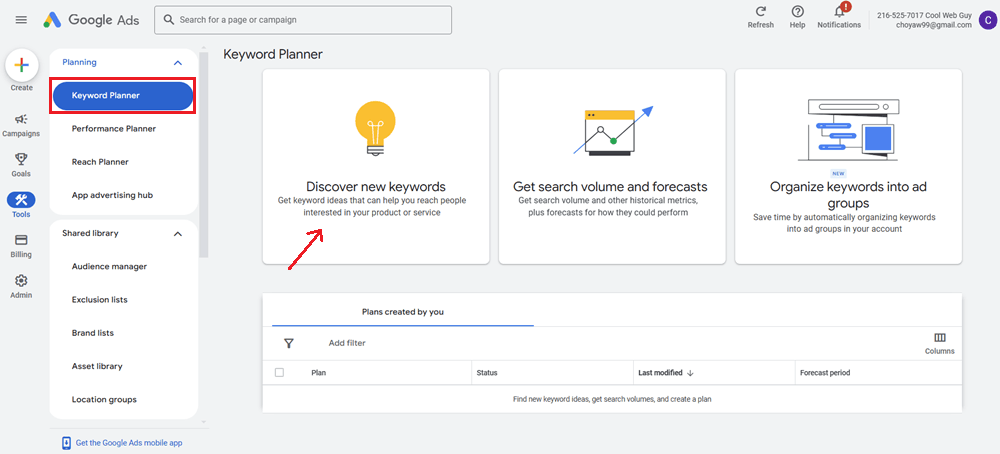
1. Google Keyword is basically the search term that someone would key into the Google Search panel (or browser search panel) when they are looking for information in the web. Hence, it is important to anticipate which are the Keywords that your potential visitor would search for in Google. The Google Planner would allow you to plan for these Search Terms that you can include into your Ad Campaign so that whenever someone search for a particular term, your Ad will appear in the search result as a sponsored link.
To plan for your Keywords, the first step is to mouse-over the "Tools" icon on the side panel and click on the "Keyword Planner" option. Then, click on the "Discover new keywords" tile on the screen.
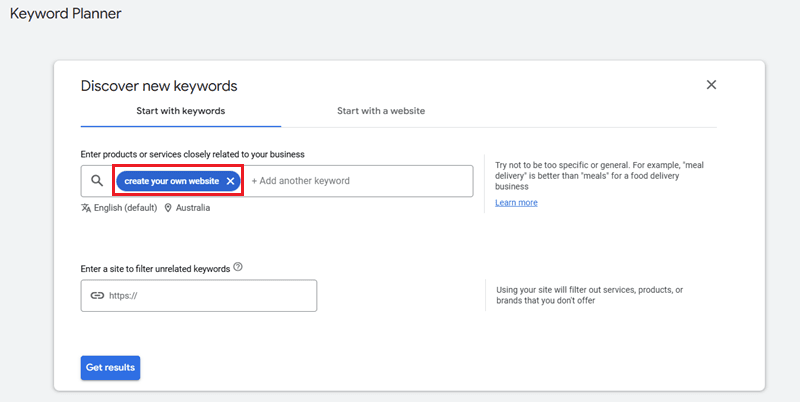
2. Next, key in the Keyword phrase that you think people would most likely use in search for your services or products. You may key in more than one Keyword phrase into the field provided. Then, click on the "Get results" button.
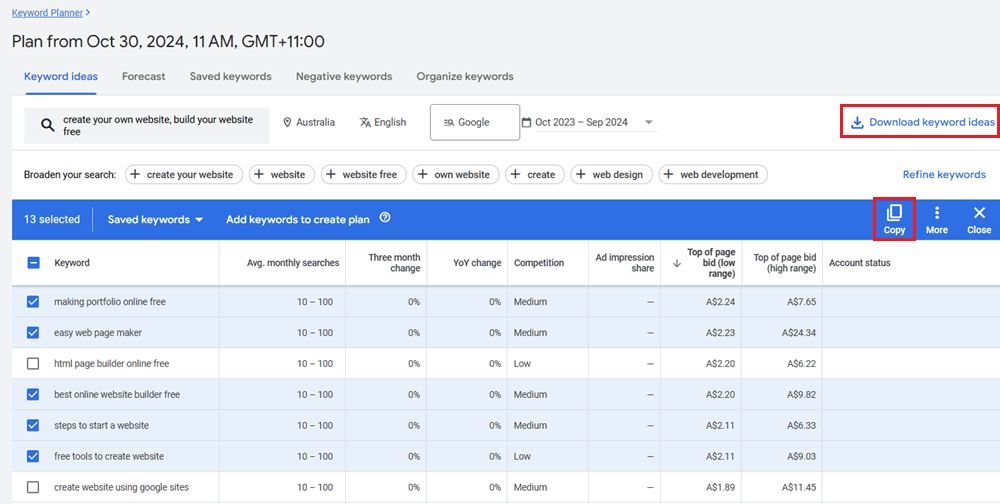
3. Upon clicking on the "Get results" button in the previous step, the suggested Keyword list will be displayed on the screen. It tells you for the Keyword in each row what is the average monthly search frequency in Google, the competition level of the Keyword, and the bidding prices to appear on the top of the search result (from low to high)
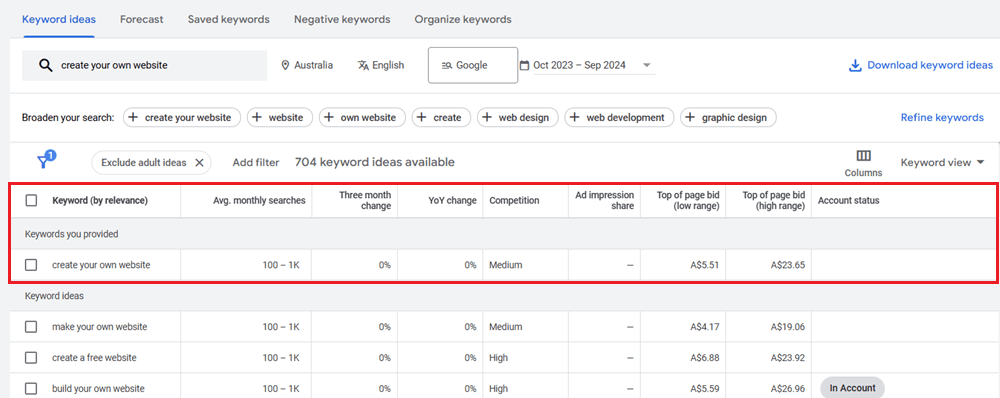
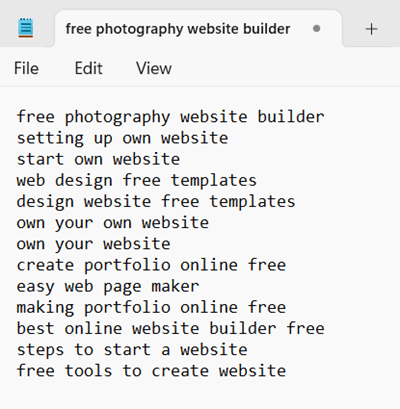
4. You can choose the Keywords by clicking on the tick-box on the left of the Keyword and then click "Copy". To save it to your local document e.g. Notepad, simply trigger the Ctrl-V keyboard command. You can also save the full Keywords list into a spreadsheet by clicking on the "Download keyword ideas" button.
1. To setup the Bid Strategy, mouse-over the "Tools" icon on the side panel, and click on the "Bid strategies" under the "Budgets and bidding". On the screen displayed, click on the "+" sign and a dropdown list of all bid strategies will be displayed. You may refer to Google Ads Help on guides on which bid strategies is most suitable for your advertising objectives.
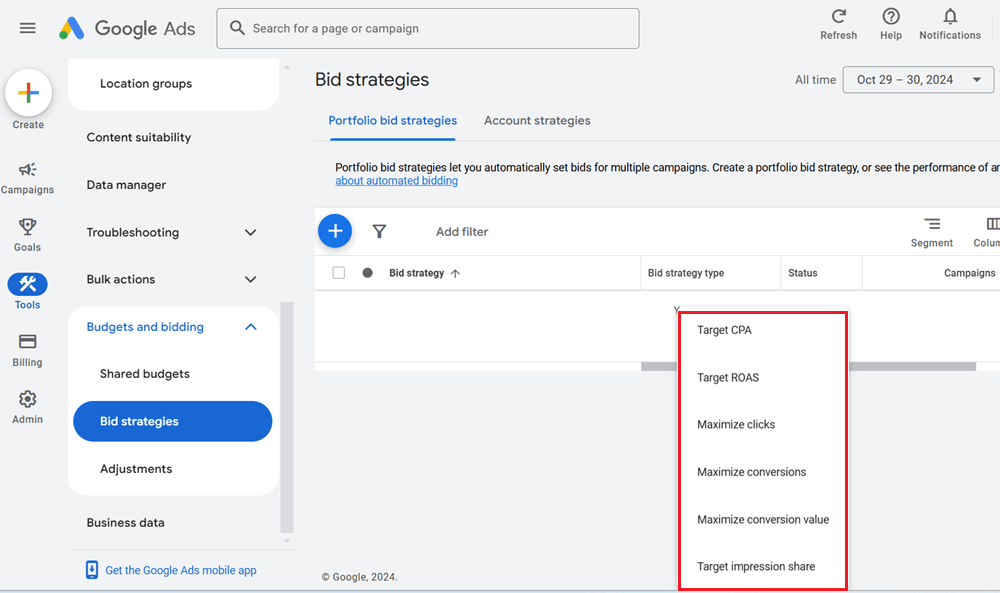
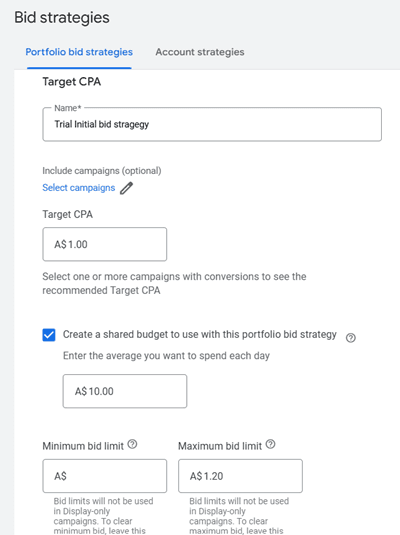
2. For the purpose of this learning, CPA (Cost per action) bid strategy will be used. As demonstrated below, "Target CPA" indicates the amount that you are willing to pay per click on your Ad. Depending on how popular is the Keyword that you bid for in your Ad, the optimum cost required for your Ad to appear on the first page of Google search result may vary.
You can set in here too the daily spending limit that you would pay for your Ad, and max and min bid limits for each click on your Ad.
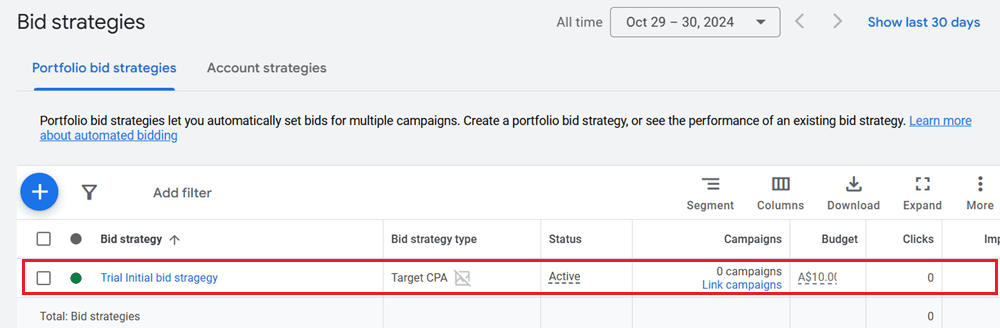
3. After you have set the bid strategy in the previous step, the Bid strategy configured would be displayed in the bid strategy list as shown below.
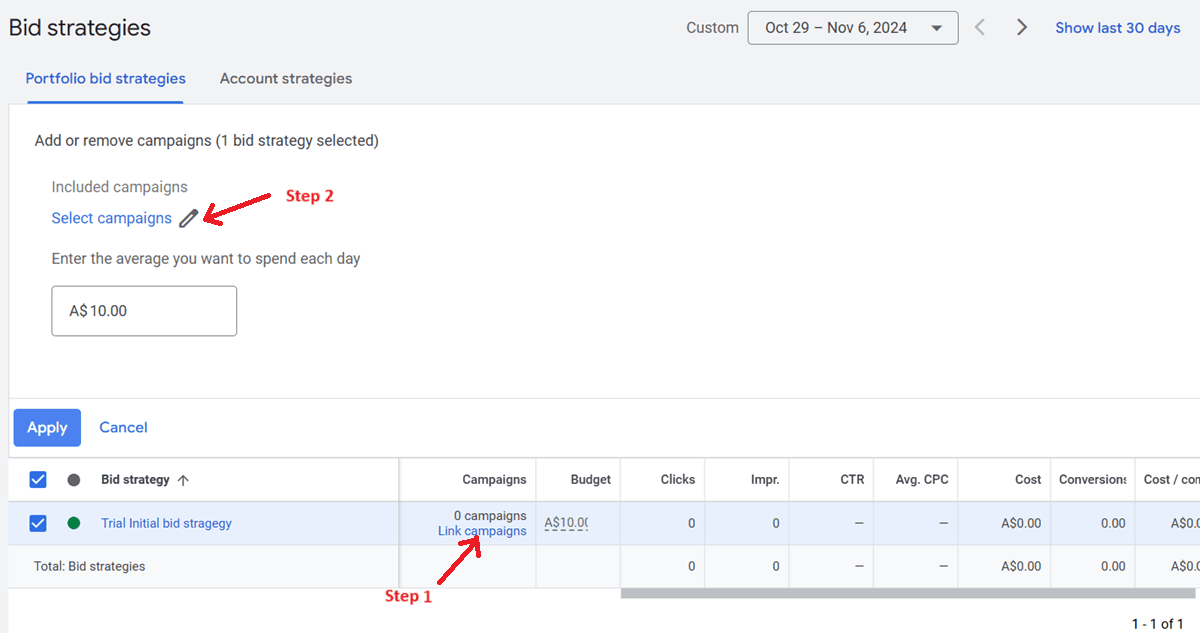
4. To link the bid strategy to an Ad Campaign, click on the "Link campaigns" link in the same row of the bid strategy, then in the "Select campaigns" setting displayed, click on the pencil icon on the right.
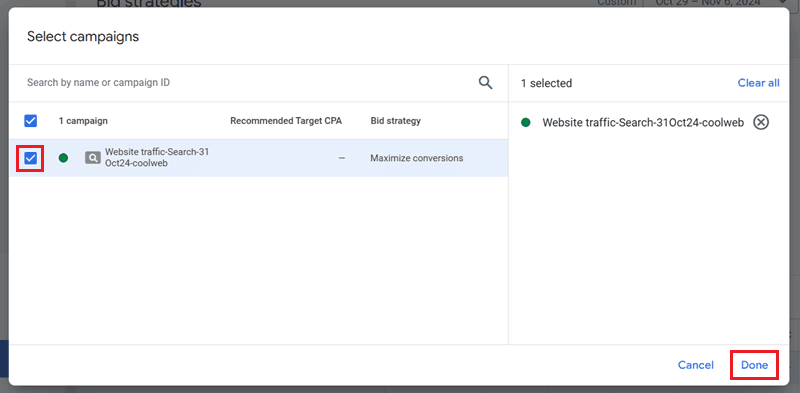
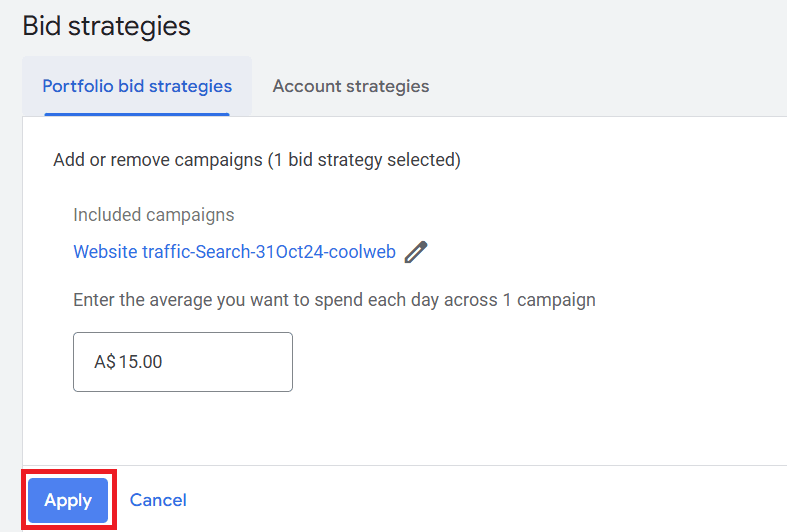
5. Select the Ad Campaign that you wish to link by clicking on the tick-box on the left, and then click on the "Done" button. In the next screen that is displayed, click on the "Apply" button to complete the whole process.
6. When you view the campaign screen in the Google Ads dashboard, you would see the Bid Strategy linked to the Ad Campaign under the "Budget" column.

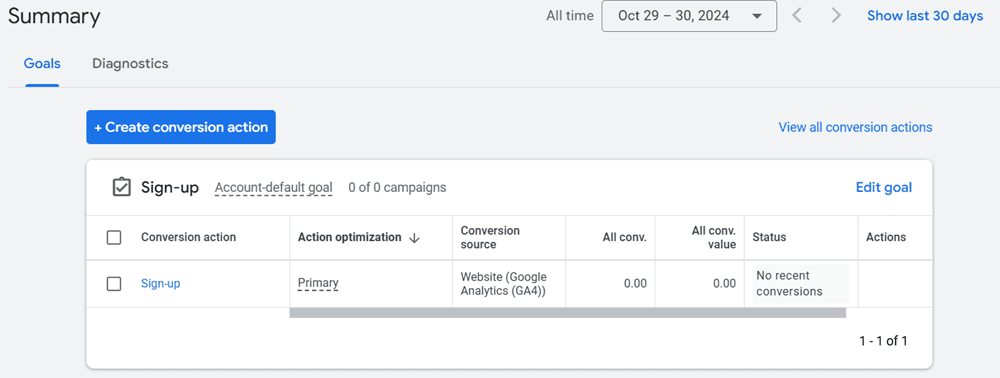
1. Conversions in Google Ads means the measure of how successful is your ad measured against your set objectives. In the example provided here, "Sign-up" with the website is defined as the objective when visitor click on the ad.
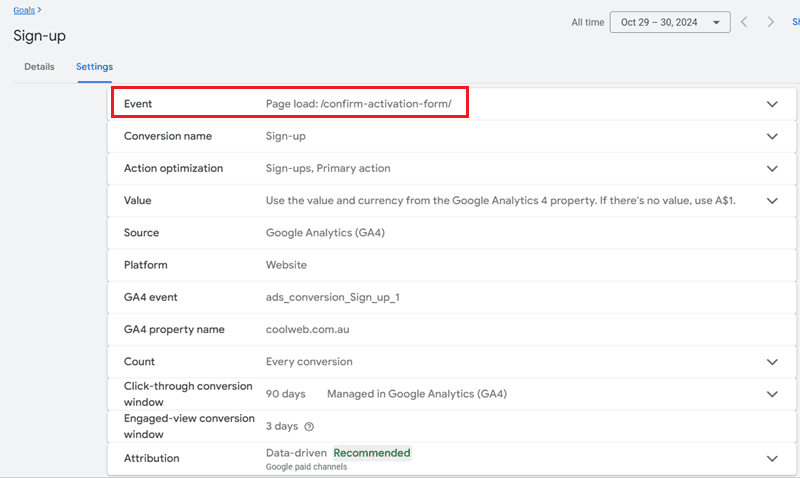
2. Clicking on the "Sign-up" conversion action in the previous step, a screen would be displayed for you to configure the action that would trigger the conversion. In this example, when "confirm-activation-form" is loaded following visitor's clicking on your Ad is set as the action to trigger a conversion.
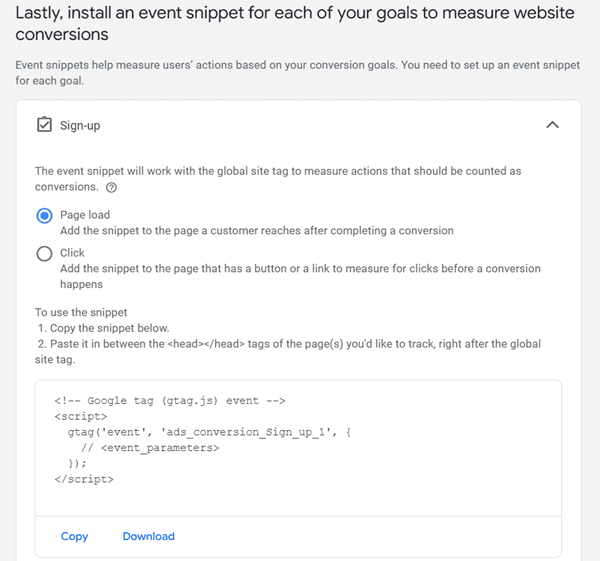
3. In order for Google to know when your specified page is loaded, you will need to copy the Snippet and paste it to the HTML header of your page.
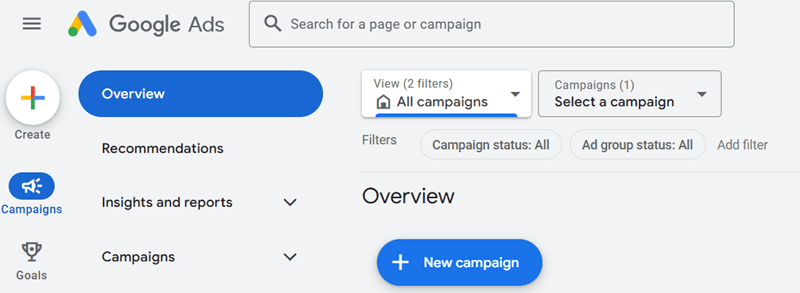
1. Create an Ad Campaign in Expert mode is a more targeted and effective way to setup your Ad in Google if you have limited budget and yet want to maximize the returns on your advertisement. To start on a new Campaign, mouse-over the "Campaigns" icon on the left, and in the menu list that is displayed, select the "Overview" option. On the screen displayed, click on "+ New campaign" to get started.
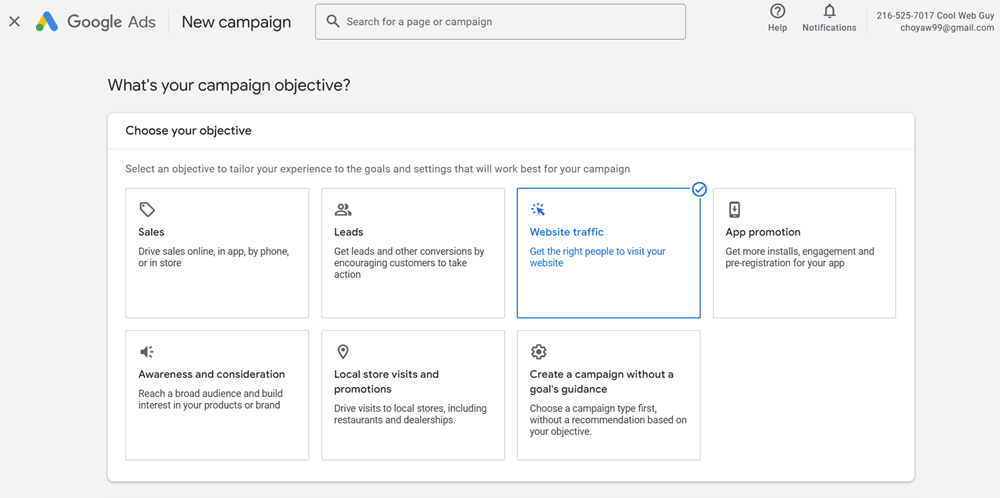
2. In the next screen, choose the objective of your Ad Campaign
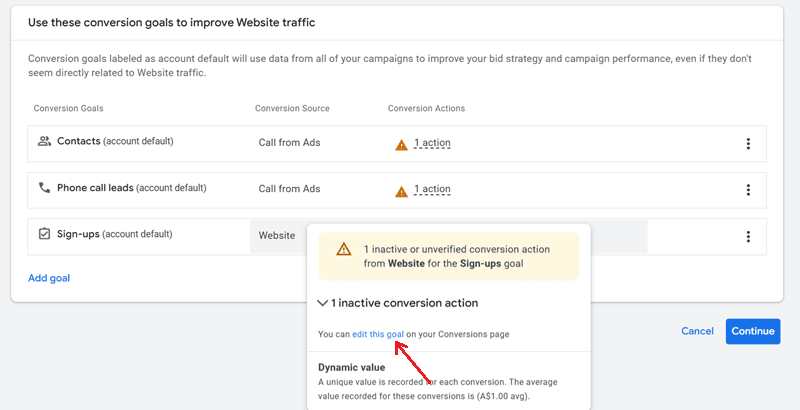
3. Next, add the conversion goals for the Ad Campaign. Google may automatically suggest some of the conversion goals for you, you would need to decide to keep or discard them. You would want to edit the goal so that the action that triggers the conversion is setup properly (refer to Change Conversion setting in Expert mode section on details on how to setup conversion action)
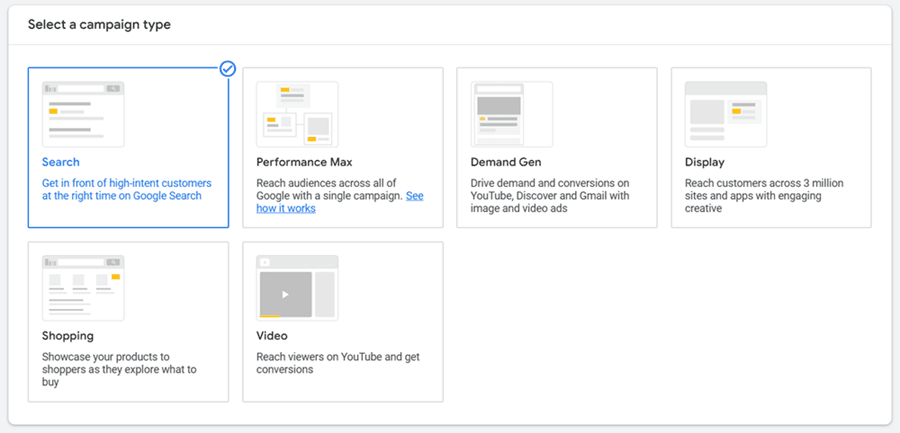
4. In the next few steps, you will be asked to select the campaign type.
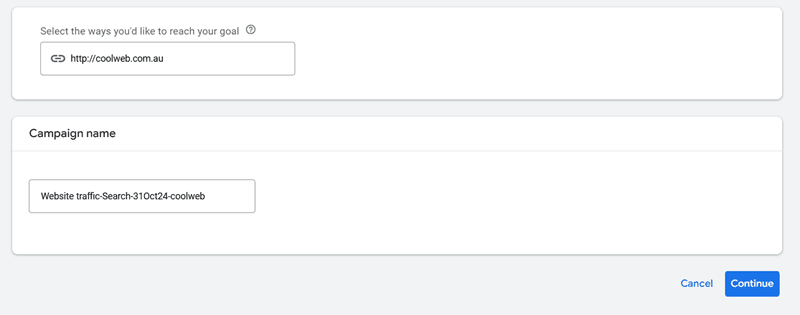
5. Next, link your website or other web assets to the Ad Campaign and gives a name to your campaign.
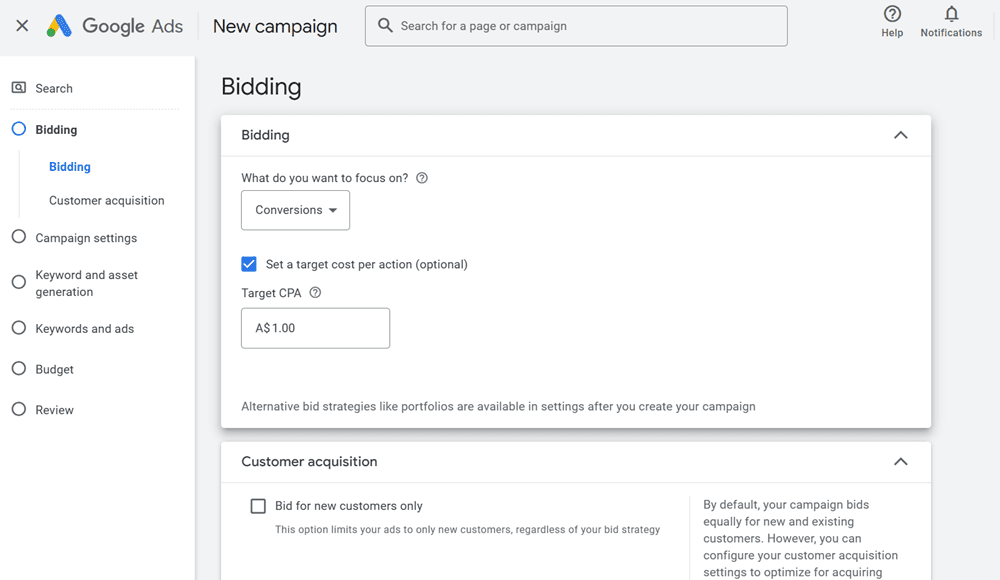
6. The next step is to determine the Bidding, which in other word is how much you are willing to pay for each click on the Ad. You can set different types of Bid Strategy as illustrated in Setup Bid Strategy in Expert mode section
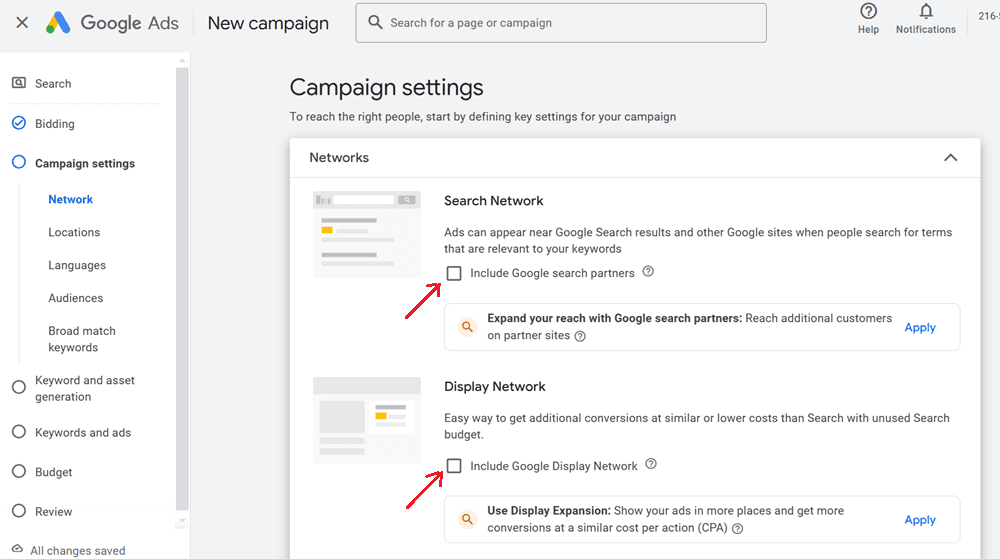
7. The Search network and Display network defines how widely you would want to broadcast your Ad. The rule of thumb is to keep within Google's networks first and if you are not getting the desire level of responses then you may expand it to other search partners networks later.
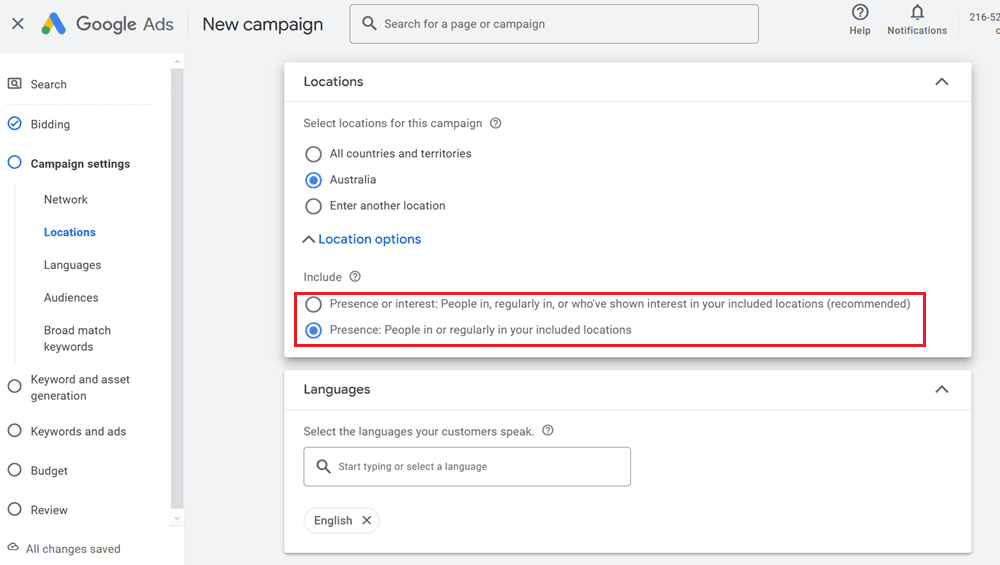
8. Next is to set the location where you want the Ad to appear.
Do note if you choose to include "Presence or interest: ...", visitors who might not be residing in the location you specified but have interest of the location would also be included as your targeted audience too.
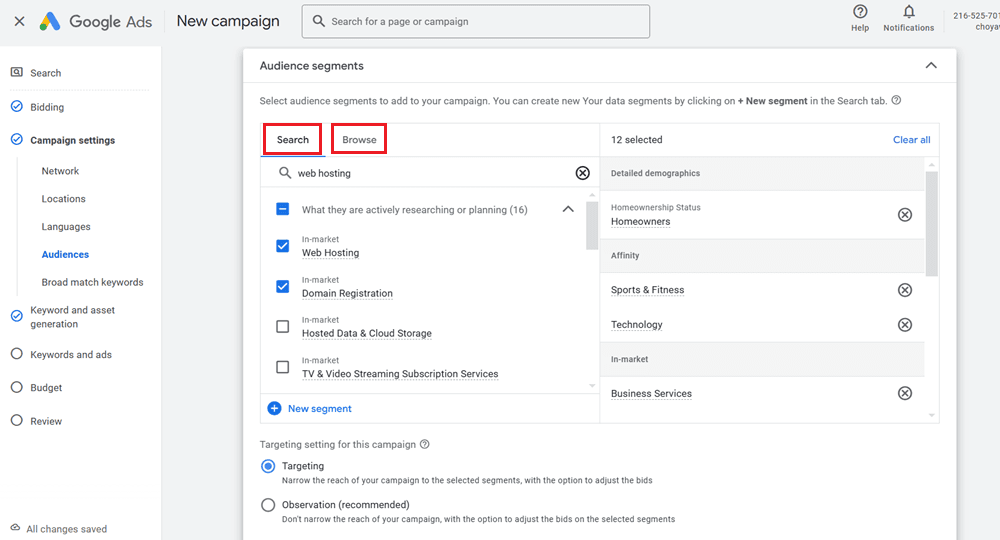
9. For the "Audiences" part, you can specify the types of audience that you want to reach out. Google would suggest some of the broad categories which you may want to target, you can also browse and select on specific segments that you think your potential customers may be found.
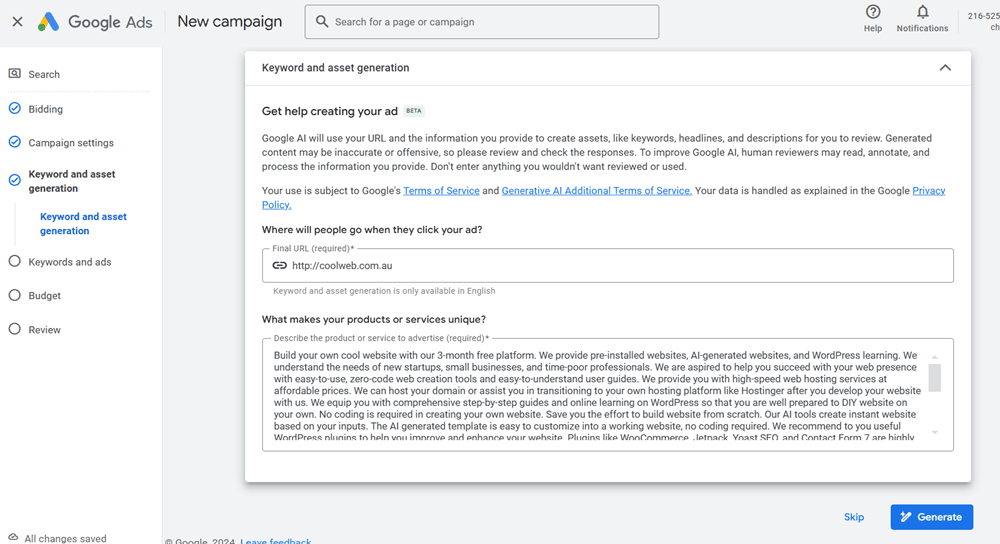
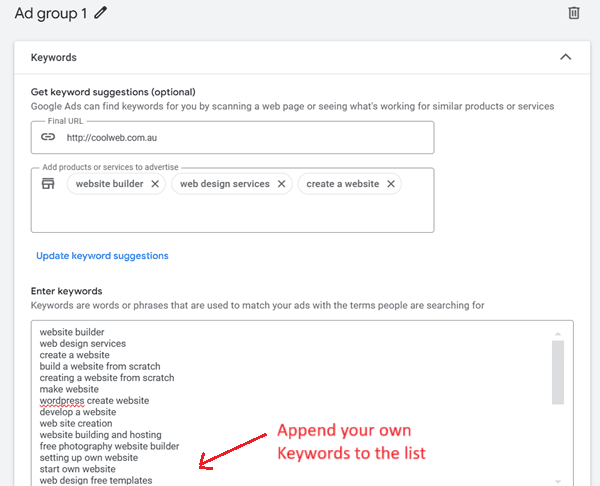
10. For the "Keyword and asset generation" part, Google would auto-generate some Keywords based on description that they can make out of your website or web assets.
11. On top of Keywords recommended by Google, you can include your own keywords that you may have selected in the Keyword Planner.
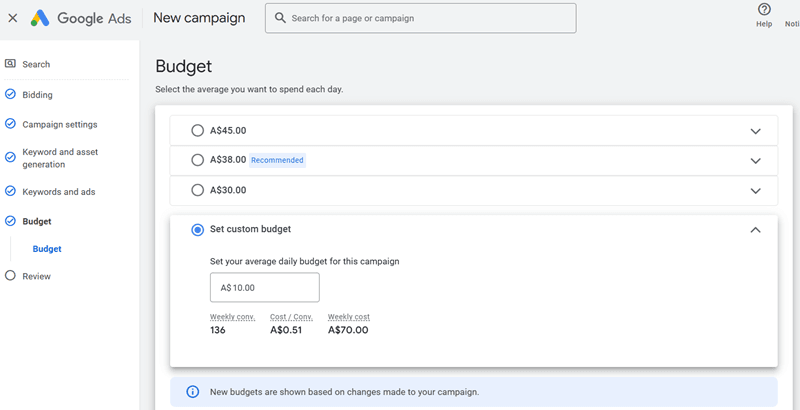
12. Next, you will be asked to set the daily budget for your Ad Campaign. With the amount that you inputted, Google would estimate the weekly conversion that you may get.
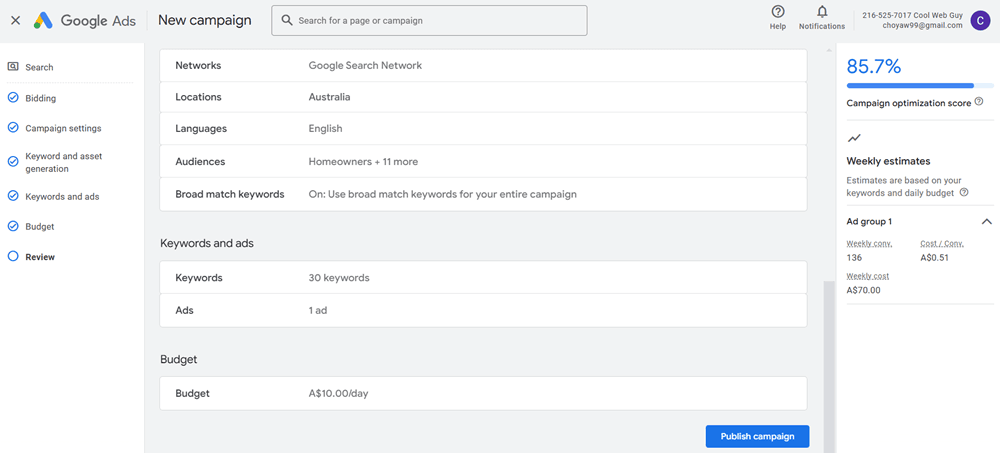
13. After you review the Ad campaign and click on the "Publish campaign" button, the Ad will be sent to Google to be reviewed.
14. Upon approval of the Ad Campaign, you can continue to monitor the progress of your Ad through the Google Ads dashboard.
