Topic
WordPress page editor user guide
For WordPress website, your website pages are organised in "Pages", that includes your Home page, and they can be created/ edited/ deleted through WordPress admin screen. WordPress comes with its standard page editor, we would show you how to use it in this guide. There are also many other 3rd party WordPress editors that are available for free. Some for them like Elementor, has many user-friendly features that would make page editor easier for the user.
Usage
The WordPress editor is the basic construct in WordPress that allows you to create new pages or edit existing pages. You would be able to update text, images and make used of its standard formatting tools to arrange text and images in the desired format in your website.
Key points to note
- Use a ready template to modify instead of creating your web pages from scratch
- Use consistent colour scheme and text formatting throughout your web pages
- Inclusion of too many images in the page would slowdown the page loading speed
- Keep each web page short and concise and choose the wordings that are SEO friendly
Steps
1. In the WordPress admin dashboard, click on the "Pages" menu item at the side panel. Find the page with the title "Home - Front Page", and when you mouse-over it, a few sub-menu item will appear below the page title. Click on the "Edit" sub-menu item to proceed with editing the Home page

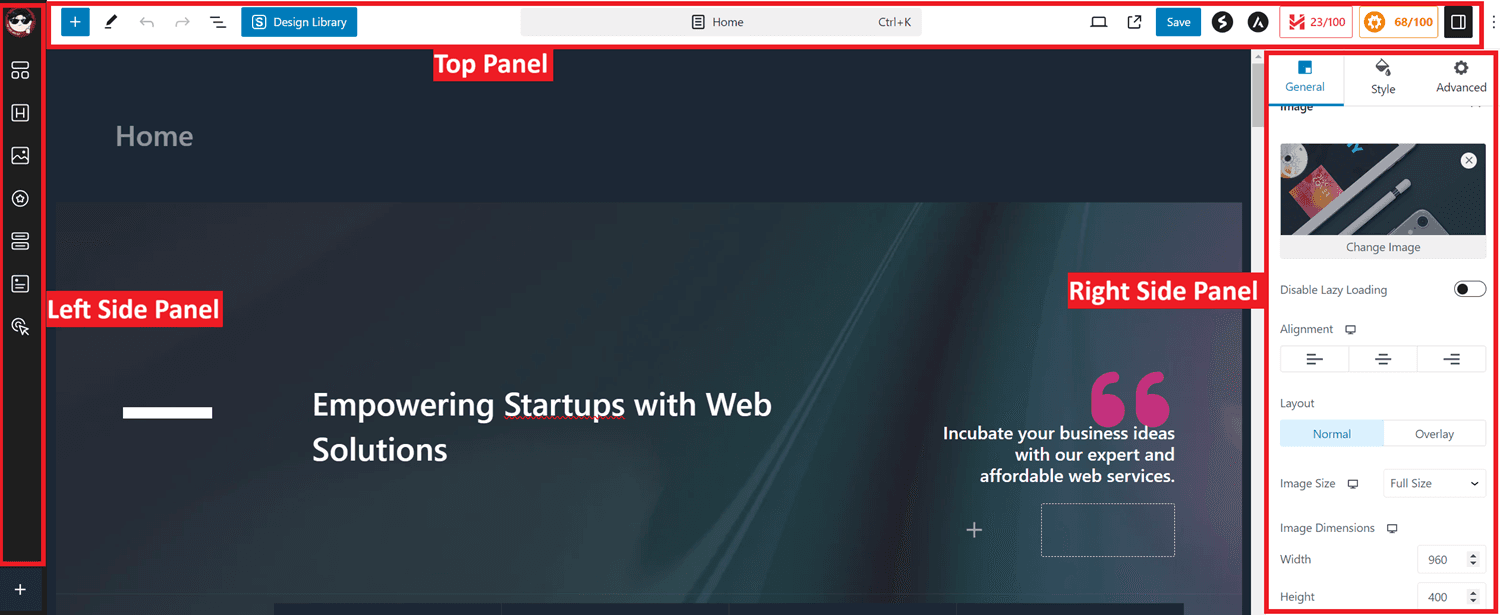
2. Upon clicking on the "Edit" sub-menu item, the editing screen for WordPress page will be displayed with editing functionalities available in left side panel, top panel and right side panel
1. When you click on the text section that you want to edit, an editing functions panel will appear on top of the text box. Some standard editing functions are available for you to edit the text.

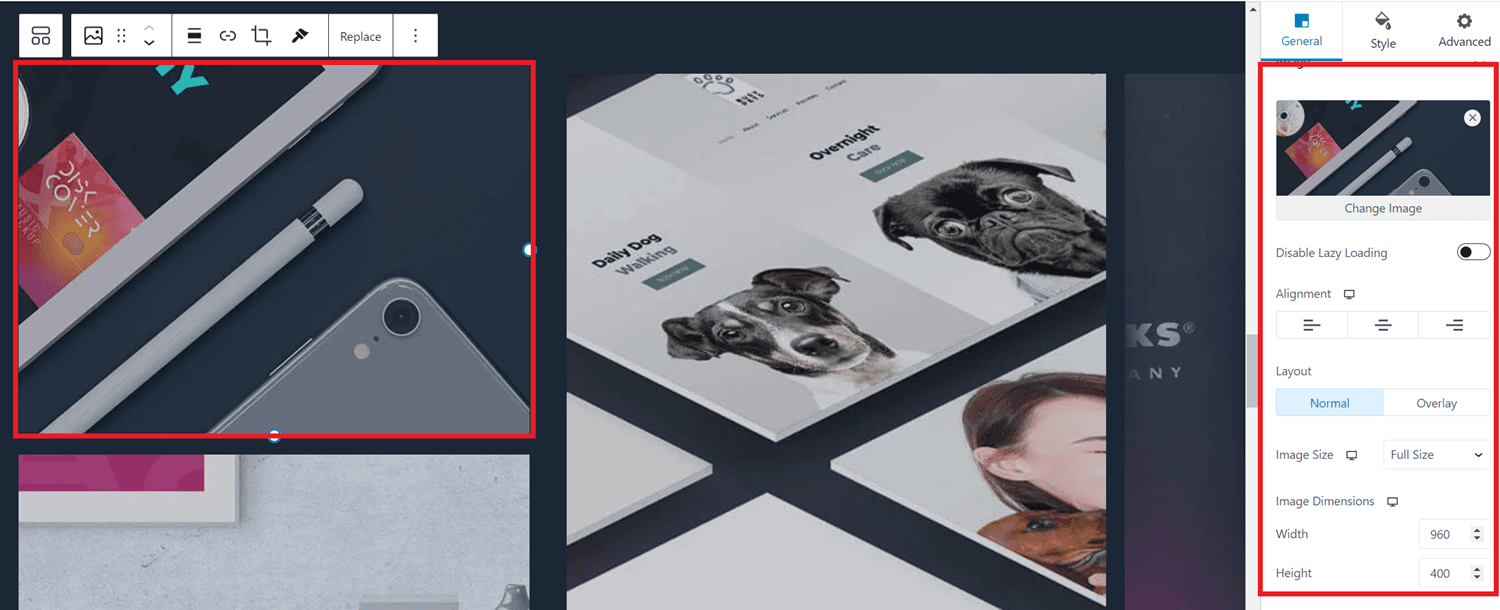
2. When you click on the image that you want to edit/replace, the image details are displayed at the right side panel, you can replace the current image, resize the image and style the image
1. You can traverse to the area of the page that you want to perform the editing by first clicking on the 3 lines icon in the Top Panel. Upon clicking the icon, a List View will appear at the left hand side of the screen containing the struct of the page. When you click on a menu item in the List View the corresponding page area will be selected at the right hand side of the screen

2. To change the location of an item in the page, you just need to simply click and hold on the mouse, and drag it to the new location you want to place it

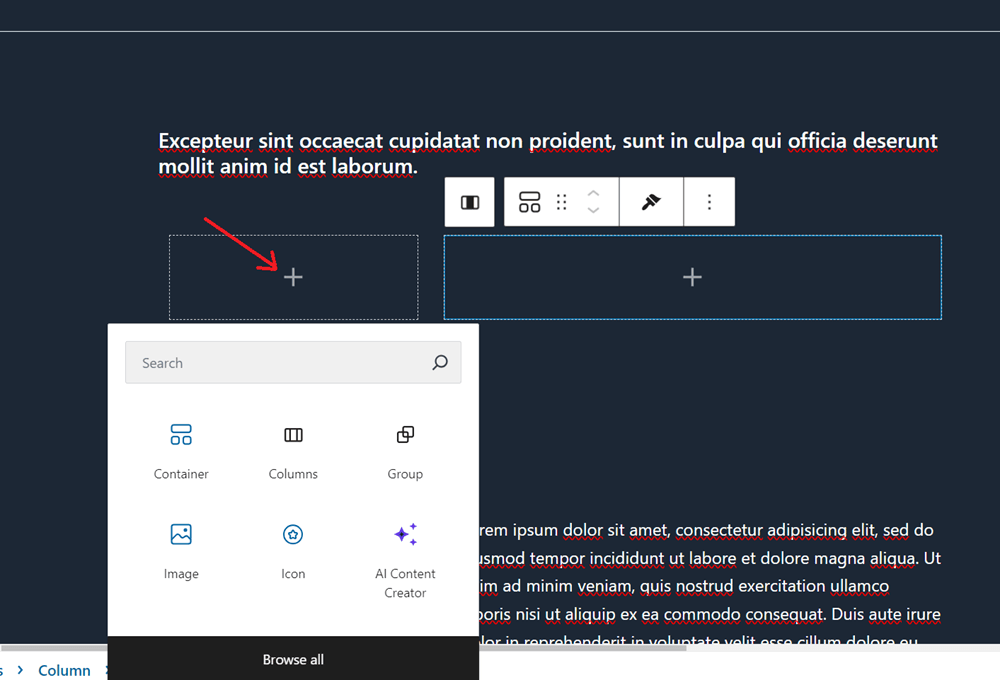
1. You can add a new item to the page by clicking on the "+" icon in the Top Panel

2. Upon clicking on the "+" icon, a list of functions available to add to the page will be listed

3. You can also add a new function to the page by clicking on the "+" sign shown in the container of the page
4. By organising you functions into the container groupings, would make it easier for you to manage the whole block e.g. Copying, Moving and Deleting

1. For quick editing, you can make use of the shortcut functions available on the editing panel on top of the page area that you select. By clicking on the down arrow icon in the panel, a list of available editing functions will appear

2. For the selected page area, the detail editing functions can be found in the right side panel. These editing functions are organised in 3 different tabs. The "General" tab contains functions for you to choose the font size, alignment etc.

3. The "Style" tab contains functions to set your margin, border style, spacing etc.

4. There is one function in the "Advanced" tab that is quite useful if you want to set a certain page area to be visible for a particular responsive conditions

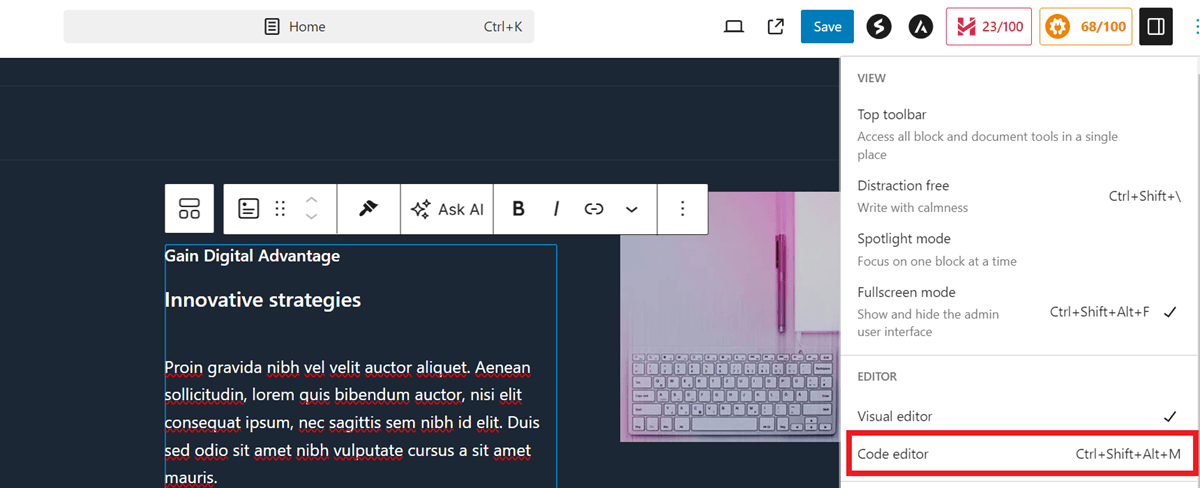
1. For advanced user who are familiar with HTML codes, you can switch to the Code editor mode by clicking on the "3 dots" icon at the top right hand corner and in the dropdown menu select the "Code editor" menu item
2. You can also edit the HTML codes of the selected page area by clicking on the "3 dots" icon at the right side of the panel and select the "Edit as HTML" menu item

3. The HTML codes will be displayed for you to make the intended changes. You can switch back to visual mode by simply clicking on the "Edit visually" menu item on top

1. You may want to add some advanced feature like online form to your web page, this would call for adding of "Shortcode" to your web page. This can be done by clicking on the "+" icon in the Top Panel and select the "Shortcode" icon in the list displayed. A corresponding "Shortcode" area would appear in the page where you placed it, type or paste the shortcode into the textarea provided

2. Upon saving the page, you would see the function provided by the shortcode included in the web page
